
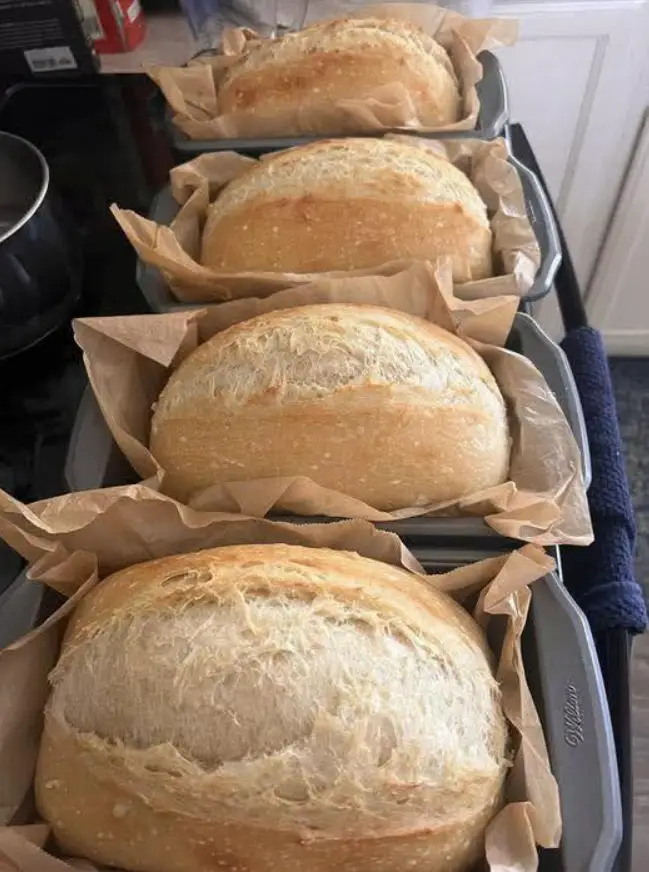
Homemade bread doesn’t have to be complicated! This soft, fluffy, and foolproof no-knead sandwich bread is perfect for everyday meals. It’s butter-free, egg-free, and requires minimal effort—just mix, rise, and bake.
With detailed instructions, pro tips, and variations, this guide will help you master the art of effortless bread baking in your own kitchen!
What Makes This Bread Special?
✔ No Kneading Required – No stand mixer, no dough hook, no arm workout.
✔ Minimal Ingredients – Just 5 pantry staples!
✔ Soft & Fluffy Texture – Perfect for sandwiches, toast, and more.
✔ Beginner-Friendly – No baking experience needed.
✔ Dairy-Free & Egg-Free – Great for those with dietary restrictions.
✔ Bakes in a Loaf Pan – No fancy Dutch oven required!
The Science Behind the Ingredients
1. Flour (Structure) – 3 ½ cups (440g) All-Purpose or Bread Flour
- All-Purpose Flour = Softer, more delicate crumb.
- Bread Flour = Chewier texture with a slightly stronger rise.
Tip: For a whole wheat version, replace up to 50% of the flour with whole wheat flour. More than that can make the bread denser.
2. Water (Hydration) – 1 ½ cups (360ml) Warm Water
- Activates the yeast.
- Hydrates the flour to form gluten.
- Controls dough consistency.
Perfect Water Temperature: 105°F-110°F (40°C-45°C)—warm, but not hot. Too hot = kills yeast. Too cold = slow rise.
3. Sugar (Food for Yeast) – 2 tsp
- Feeds the yeast, helping it activate and rise.
- Adds a slight hint of sweetness to balance flavors.
Alternative: Substitute honey or maple syrup for natural sweetness.
4. Salt (Flavor & Dough Strength) – 1 ½ tsp
- Balances the taste.
- Strengthens gluten, making the dough more elastic.
- Slows down yeast growth to prevent over-proofing.
Tip: Always mix salt with flour, not directly with yeast (it can weaken the yeast).
5. Yeast (Leavening Agent) – 2 ¼ tsp (1 packet) Instant Yeast
- Traps air bubbles in the dough, making the bread rise.
- Works faster than active dry yeast.
Using Active Dry Yeast? Proof it in warm water with sugar for 10 minutes before adding flour and salt.
Step-by-Step Instructions
Step 1: Activate the Yeast
1️⃣ In a large bowl, mix warm water, sugar, and yeast.
2️⃣ Let sit for 5-10 minutes until foamy.
Tip: No bubbles? Your yeast may be expired. Try again with fresh yeast.
Step 2: Mix the Dough
1️⃣ Add flour and salt to the bowl.
2️⃣ Stir with a wooden spoon or spatula until fully combined.
3️⃣ The dough will be sticky and shaggy—this is normal!
No-knead dough is wetter than regular bread dough. A sticky dough = soft bread!
Step 3: First Rise (Bulk Fermentation)
1️⃣ Cover the bowl with plastic wrap or a towel.
2️⃣ Let it rise in a warm place for 1 hour, or until doubled in size.
Ideal Rising Locations:
✔ Near a sunny window 🌞
✔ Inside a turned-off oven with the light on
✔ On top of the fridge (gentle warmth)
✔ Inside a microwave with a cup of hot water for humidity
Step 4: Shape the Dough
1️⃣ Grease a 9×5-inch loaf pan with non-stick spray or oil.
2️⃣ Use a spatula to gently transfer the dough into the pan.
3️⃣ Smooth the top, but don’t press down too much—keep it airy!
Tip: If dough is too sticky to handle, lightly flour your hands or spatula.
Step 5: Second Rise (Final Proofing)
1️⃣ Cover the pan and let the dough rise for 30-45 minutes, until puffed up.
2️⃣ It should rise just above the rim of the pan.
Don’t overproof! If the dough rises too much, it can deflate while baking.
Step 6: Bake the Bread
1️⃣ Preheat oven to 375°F (190°C).
2️⃣ Bake for 30-35 minutes, until the crust is golden brown.
3️⃣ The bread is done when it sounds hollow when tapped on top.
Tip: If the top browns too quickly, tent with foil for the last 10 minutes.
Step 7: Cooling & Slicing
1️⃣ Let the bread cool in the pan for 10 minutes.
2️⃣ Transfer to a wire rack and cool completely before slicing.
Why wait? Cutting too soon makes the bread gummy inside.
Pro Tips for Perfect No-Knead Bread
✔ Use fresh yeast – Old yeast = flat bread.
✔ Sticky dough = good dough – Don’t over-flour!
✔ Control the rise – Too short = dense. Too long = collapses.
✔ Preheat the oven fully – Ensures even baking.
✔ Cool before slicing – Patience = perfect crumb!
How to Store & Freeze Bread
Storing at Room Temperature:
- Keep in an airtight bag or container for up to 4 days.
- Avoid the fridge—it dries out the bread!
Freezing Instructions:
- Wrap the whole loaf (or slices) tightly in plastic wrap + foil.
- Store in a freezer bag for up to 3 months.
- To thaw, leave at room temperature for a few hours, or toast slices directly from frozen.
Fun Variations & Add-Ins
Savory Versions
✔ Garlic & Herb: Add 1 tsp garlic powder + 1 tsp Italian seasoning.
✔ Cheese Bread: Fold in ½ cup shredded cheddar.
✔ Seeded Loaf: Sprinkle sesame or sunflower seeds on top before baking.
Sweet Versions
✔ Cinnamon Raisin: Add 1 tsp cinnamon + ½ cup raisins.
✔ Honey Oat: Swap sugar for honey and sprinkle oats on top.
Final Thoughts
This No-Knead Sandwich Bread is the easiest way to enjoy homemade bread without the hassle! With its soft texture and simple method, it’s perfect for any home baker.