
Snickers Peanut Butter Cookies
A nostalgic favorite meets a candy bar twist
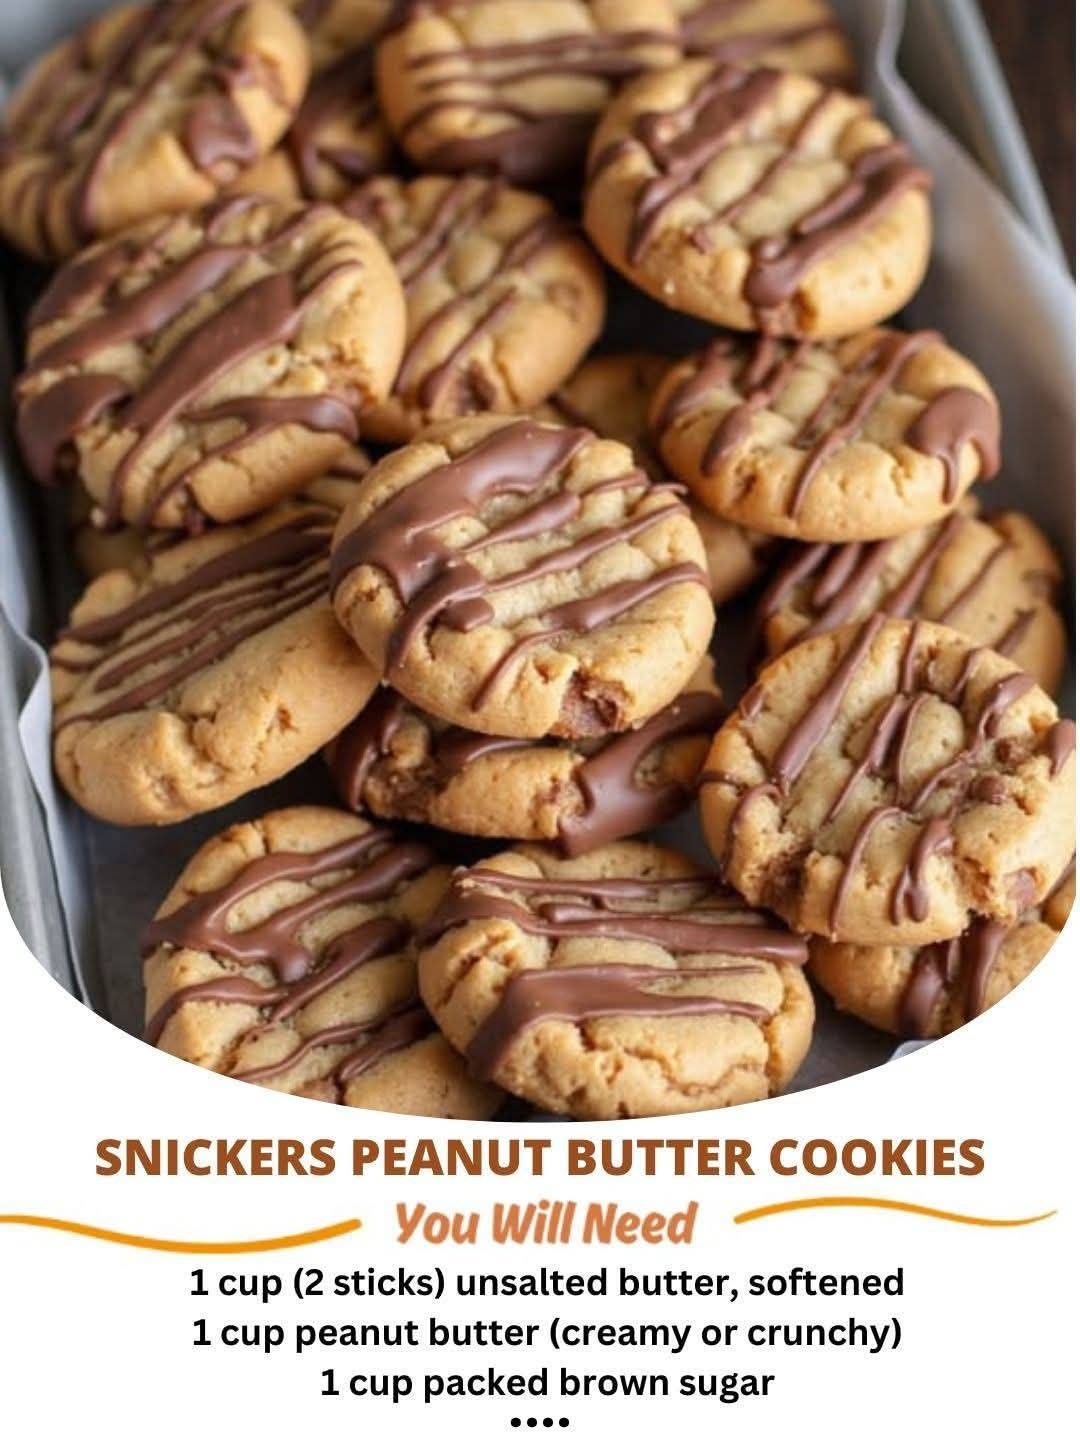
There’s something deeply comforting about the smell of peanut butter cookies baking in the oven. It’s a scent that evokes childhood memories, after-school treats, and simple joys. But when you take that classic comfort and introduce a rich, chocolatey surprise—Snickers—you elevate the entire experience. These Snickers Peanut Butter Cookies are soft and chewy on the outside, gooey in the center, and layered with the perfect balance of sweet, salty, and nutty goodness. Whether you’re baking for a crowd, packing lunchbox treats, or just treating yourself after a long day, these cookies never fail to delight.
This recipe is not just a treat—it’s a conversation starter. The moment someone bites into what looks like a humble peanut butter cookie and hits that molten center of nougat, caramel, and chocolate, the reaction is always the same: wide eyes, happy surprise, and a request for another. These cookies have become a favorite in our home and a requested staple at bake sales, family gatherings, and office potlucks. What makes them even better? They’re easy to make, freezer-friendly, and adaptable to all sorts of preferences. Let’s dive into how these irresistible cookies come together—and how you can make them your own.
The Story Behind the Cookies
The first time I made these cookies, it was on a whim. I had a bowl of peanut butter cookie dough chilling in the fridge, and a leftover bag of mini Snickers bars from Halloween that no one had touched. Rather than let those chocolates go stale, I decided to experiment. I chopped a few up, pressed them into the center of each dough ball, and hoped for the best. What came out of the oven was nothing short of magic: warm, golden cookies with molten chocolate centers and just the right touch of salty peanut crunch. The caramel oozed slightly, the nougat held its chew, and the balance of flavors was better than any bakery cookie I’d had.
Since then, these cookies have become a family tradition. My kids now ask for them by name, and my friends often request a batch for birthdays or holidays. They’re perfect in every season—served warm with hot cocoa in the winter or packed into picnic baskets during summer. Their charm lies not only in their taste but in their simplicity. You don’t need fancy ingredients or complicated techniques—just a love of peanut butter and a fondness for candy bars.
Ingredients Overview
Before we get into the method, let’s look at the ingredients and why they matter. Each one plays a vital role in achieving that perfect texture and taste.
Creamy Peanut Butter: The base of the cookie. Choose a smooth, shelf-stable peanut butter (like Jif or Skippy) for best results. Natural peanut butters tend to separate and can alter the consistency of the dough.
Unsalted Butter: Adds richness and moisture. Room-temperature butter is easier to cream with sugar, which gives the cookies a light, fluffy texture.
Granulated Sugar and Brown Sugar: The combination of both gives these cookies structure and flavor depth. Brown sugar adds a chewy texture and slight molasses note.
Egg: Binds the dough and adds moisture.
Vanilla Extract: Enhances the overall flavor. Real vanilla is worth the investment here, but a good-quality imitation works in a pinch.
All-Purpose Flour: Gives the cookies their structure.
Baking Soda and Salt: Baking soda helps the cookies rise and spread, while salt enhances flavor.
Mini Snickers Bars: The star of the show. These little bites of caramel, nougat, and chocolate melt beautifully into the center of each cookie.
Ingredients List
- 1/2 cup (1 stick) unsalted butter, softened
- 1/2 cup creamy peanut butter
- 1/2 cup granulated sugar
- 1/2 cup brown sugar, packed
- 1 large egg
- 1 teaspoon vanilla extract
- 1 1/4 cups all-purpose flour
- 1/2 teaspoon baking soda
- 1/4 teaspoon salt
- About 24 mini Snickers bars (unwrapped)
Equipment You’ll Need
You don’t need any specialty equipment, but having a few tools on hand makes the process smoother:
- Mixing bowls
- Hand or stand mixer
- Rubber spatula
- Measuring cups and spoons
- Baking sheet
- Parchment paper or silicone baking mat
- Cookie scoop (optional, but helps with uniform size)
- Cooling rack
Step-by-Step Instructions
1. Preheat the Oven:
Set your oven to 350°F (175°C) and line your baking sheets with parchment paper or a silicone baking mat. This ensures your cookies bake evenly and don’t stick.
2. Cream the Butter and Sugars:
In a large mixing bowl, beat the softened butter, peanut butter, granulated sugar, and brown sugar until light and fluffy—about 2–3 minutes. This step is important for achieving that soft and tender texture.
3. Add the Egg and Vanilla:
Crack in the egg and pour in the vanilla extract. Beat until combined. You should have a smooth, creamy mixture at this stage.
4. Combine the Dry Ingredients:
In a separate bowl, whisk together the flour, baking soda, and salt. Slowly add the dry ingredients to the wet mixture, mixing until just combined. Avoid over-mixing, as that can lead to tougher cookies.
5. Chill the Dough (Optional but Recommended):
Cover the dough and refrigerate for 30 minutes. Chilling helps control spreading during baking and enhances the flavor.
6. Assemble the Cookies:
Using a cookie scoop or tablespoon, portion out the dough. Flatten each ball slightly in your palm, place a mini Snickers bar in the center, and wrap the dough around it to fully enclose the candy. Roll gently to seal and form into a smooth ball.
7. Bake:
Place the cookie balls on your prepared baking sheets, spacing them about 2 inches apart. Bake for 10–12 minutes, or until the edges are just golden and the tops are slightly cracked. The centers may still look a bit soft—that’s perfect.
8. Cool:
Allow the cookies to cool on the baking sheet for 5 minutes before transferring them to a wire rack to cool completely. The Snickers centers will firm up slightly as they cool but still remain gooey and delicious.
Storage and Make-Ahead Tips
Storage: These cookies keep well in an airtight container at room temperature for up to 5 days. For longer storage, refrigerate them for up to a week.
Freezing: You can freeze the baked cookies for up to 2 months. Wrap them tightly in plastic wrap and place them in a freezer-safe container. To enjoy, let them thaw at room temperature or microwave for a few seconds to bring back that gooey center.
Make-Ahead Dough: You can make the dough up to 3 days in advance and store it in the refrigerator. Let it soften slightly at room temperature before shaping and baking.
Variations and Substitutions
This recipe is incredibly adaptable. Here are a few fun ideas:
Different Candy Bars: Swap Snickers with mini Milky Way, Rolos, Reese’s, or even caramel-filled chocolates.
Crunch Factor: Add chopped peanuts or crushed pretzels to the dough for extra texture.
Chocolate Lovers’ Version: Stir in mini chocolate chips for double the chocolate punch.
Nut-Free Alternative: Use sunflower seed butter and a nut-free chocolate candy to make the recipe safe for those with allergies.
Tips for Success
- Don’t skip chilling the dough. It makes shaping easier and helps the cookies bake more evenly.
- Be sure the Snickers are fully enclosed in the dough to prevent leaking during baking.
- For bakery-style presentation, press a few mini chocolate chips or chopped peanuts on top of each dough ball before baking.
- Let the cookies rest on the baking sheet for a few minutes after baking. They continue to set and firm up outside the oven.
Final Thoughts
There’s something special about taking something familiar and making it feel new again. That’s exactly what happens when you fold a bite of Snickers into a beloved peanut butter cookie. It becomes more than just dessert—it becomes a memory in the making.
Whether you’re introducing someone to baking for the first time, treating guests to something they’ve never tried, or simply indulging in a quiet moment of joy, Snickers Peanut Butter Cookies offer the perfect mix of surprise, nostalgia, and indulgence. And perhaps best of all, they remind us that even the simplest ingredients—when combined with a little creativity and a whole lot of love—can create something truly unforgettable.