
Classic Banana Nut Bread Recipe: Moist, Sweet, and Timeless
Few recipes carry the same nostalgia and universal appeal as banana nut bread. It’s one of those baked goods that transcends generations, offering comfort in every slice. The natural sweetness of ripe bananas, the richness of butter, and the crunch of toasted nuts all come together in perfect harmony. Whether you’re baking it for breakfast, an afternoon snack, or simply as a way to use up overripe bananas, banana nut bread is a staple that never goes out of style.
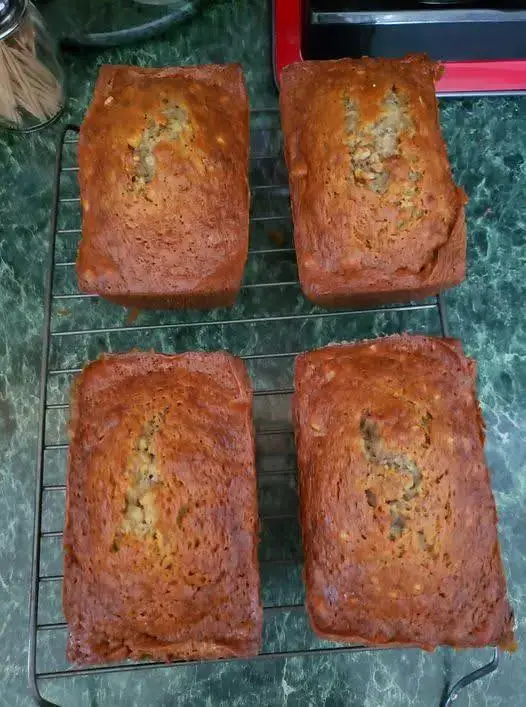
In this post, we’ll walk through the classic recipe step by step, explore the history of banana bread, share useful baking tips, suggest creative variations, and answer common questions about storage and serving. By the end, you’ll be armed with everything you need to make the perfect loaf — or four adorable mini loaves.
A Brief History of Banana Bread
Banana bread as we know it today rose to popularity in the United States during the 1930s, around the time baking soda and baking powder became household staples. Before that, overly ripe bananas often went to waste. Once home bakers realized they could transform brown, mushy bananas into moist, flavorful quick breads, a classic was born.
Cookbooks in the 1930s and 1940s often featured banana bread recipes as a thrifty way to stretch household ingredients during the Great Depression. Over the decades, the recipe became beloved not just for its resourcefulness but also for its taste and simplicity. Today, banana bread is one of the most baked recipes worldwide, with countless variations — from chocolate chip to gluten-free — but the timeless combination of bananas and nuts remains a favorite.
Why You’ll Love This Recipe
- Simple Ingredients: Uses pantry staples you probably already have.
- Moist and Tender: Four ripe bananas ensure the bread never turns out dry.
- Customizable: Swap nuts for chocolate chips, dried fruit, or leave them out altogether.
- Perfect for Sharing: Bake one big loaf or four mini loaves — ideal for gifting.
- Comfort in Every Bite: Familiar, cozy, and absolutely irresistible warm from the oven.
Ingredients You’ll Need
- Butter (½ cup): Adds richness and moisture. Use unsalted butter for more control over flavor.
- Sugar (1 cup): Granulated sugar sweetens the bread and balances the bananas.
- Eggs (2, beaten): Provide structure and help the loaf rise.
- Bananas (4, ripe): The star ingredient. The riper the bananas, the sweeter and more flavorful your bread.
- All-Purpose Flour (1 ½ cups): The base of the bread. Don’t pack it too tightly when measuring.
- Baking Soda (1 teaspoon): The leavening agent that ensures a nice rise.
- Salt (½ teaspoon): Enhances flavors and prevents the bread from tasting flat.
- Vanilla Extract (½ teaspoon): Adds warmth and depth of flavor.
- Nuts (½ cup, chopped): Walnuts or pecans add crunch and nuttiness that pairs beautifully with bananas.
Step-by-Step Instructions
1. Preheat the Oven
Set your oven to 350°F (175°C). Grease and flour one standard loaf pan, or four mini loaf pans if you prefer smaller portions. This ensures the bread doesn’t stick and pops right out after baking.
2. Cream the Butter and Sugar
In a large mixing bowl, beat together the softened butter and sugar until light and fluffy. This step incorporates air into the mixture, giving your bread a lighter texture.
3. Add Eggs and Bananas
Stir in the beaten eggs, followed by the mashed bananas. Don’t worry if the mixture looks slightly lumpy — that’s perfectly fine and adds to the bread’s rustic charm.
4. Mix the Dry Ingredients
In a separate bowl, whisk together the flour, baking soda, and salt. Adding dry ingredients separately prevents clumping and ensures even distribution throughout the batter.
5. Combine Wet and Dry Mixtures
Gradually add the dry ingredients into the banana mixture, stirring gently until just combined. Overmixing can make the bread tough, so stop as soon as you no longer see streaks of flour.
6. Add Vanilla and Nuts
Stir in the vanilla extract and fold in the chopped nuts. At this point, your kitchen should already smell like comfort.
7. Bake
Pour the batter into the prepared pan(s). For one large loaf, bake for about 1 hour. For mini loaves, check at 35–45 minutes. The bread is done when a toothpick inserted in the center comes out clean or with a few moist crumbs.
8. Cool and Serve
Let the bread cool in the pan for 10 minutes, then transfer to a wire rack. Slice thick and enjoy warm with butter, honey, or just as it is.
Tips for the Best Banana Nut Bread
- Use very ripe bananas: The darker the peel, the sweeter and more flavorful the bananas.
- Toast the nuts: Lightly toasting walnuts or pecans before adding them intensifies their flavor.
- Avoid overmixing: Mix just until combined for a tender crumb.
- Line with parchment: If you want super easy removal, line the loaf pan with parchment paper.
- Check early: Oven times vary, so begin checking mini loaves around the 30-minute mark.
Variations to Try
- Chocolate Chip Banana Bread: Replace nuts with chocolate chips for a sweeter version.
- Coconut Banana Bread: Add shredded coconut to the batter for tropical flair.
- Cinnamon Swirl Banana Bread: Layer in a mixture of cinnamon and sugar for a sweet swirl.
- Gluten-Free Option: Substitute gluten-free flour for all-purpose flour.
- Healthier Version: Replace half the butter with Greek yogurt and swap sugar for honey or maple syrup.
Storage and Freezing
- Room Temperature: Store in an airtight container for up to 3 days.
- Refrigerator: Keeps well for about 5 days — slightly denser but still delicious.
- Freezer: Wrap tightly in plastic wrap and then foil. Freeze up to 3 months. Thaw overnight in the fridge before serving.
Serving Suggestions
- Warm with a pat of salted butter or cream cheese.
- Toasted slices topped with peanut butter or almond butter for breakfast.
- Served with fresh fruit and yogurt for a light meal.
- As part of a holiday brunch spread.
- Wrapped in parchment and ribbon as a thoughtful homemade gift.
Frequently Asked Questions
1. Can I make banana bread without nuts?
Absolutely. Just leave them out or replace them with chocolate chips or dried fruit.
2. Can I use frozen bananas?
Yes. Thaw them first, drain excess liquid, and mash before adding.
3. Why is my banana bread dry?
Likely from overbaking or too much flour. Always spoon and level flour rather than scooping directly from the bag.
4. Can I double this recipe?
Yes, simply double the ingredients and bake in two loaf pans.
5. How can I make it more moist?
Add ¼ cup sour cream or Greek yogurt for extra tenderness.
Final Thoughts
Banana nut bread isn’t just a recipe — it’s a tradition. Passed from kitchens to cookbooks, from grandmothers to grandchildren, it remains one of the most beloved baked goods of all time. With its moist crumb, nutty crunch, and sweet banana aroma, this recipe is proof that simple ingredients can create something extraordinary.
Whether you’re baking one loaf for the family or four mini loaves to share with friends, this recipe guarantees warmth, comfort, and maybe even a new tradition in your own kitchen.
So, the next time you see bananas turning brown on the counter, don’t toss them. Bake them into something timeless — a loaf of banana nut bread that will fill your home with sweetness and your table with smiles.