
The Secret Recipe That Stole 3 Generations’ Hearts!
There is a magical moment in every family’s history when a humble dish transforms into a treasured heirloom. For generations, these Crispy Chicken Fritters have held that place in our home—a recipe so cherished that it commanded silence the moment Grandma walked in with her iconic platter. The aroma alone was enough to make every cousin pause mid-conversation, eyes widening as the golden, crackling fritters made their way to the table.
What began as a simple weeknight meal quickly became a tradition—one filled with warmth, nostalgia, and that unmistakable crunch that made everyone fight for the last fritter. In sharing this recipe, we aren’t simply offering instructions; we are passing down a piece of our family’s soul, perfected over decades and beloved by every generation.
Why These Crispy Chicken Fritters Are a Timeless Classic
A Perfect Contrast of Textures
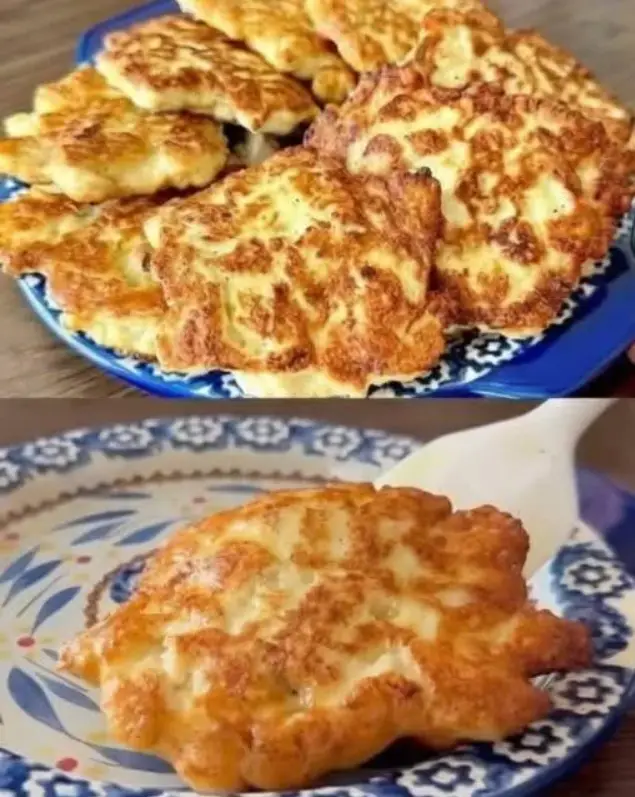
Achieving the balance between a shatteringly crisp exterior and an interior that remains cloud-soft, juicy, and tender is an art form. This recipe masters that delicate interplay, resulting in fritters that are irresistibly light yet deeply satisfying with every bite.
Layers of Flavor That Dance on Your Tongue
Each fritter is a harmony of savory chicken, aromatic herbs, subtle spices, and a hint of Parmesan that enhances its richness. The moment you hear that first crackle, you know you’re in for something extraordinary.
Versatility for Any Occasion
Whether it’s game day, a holiday appetizer, a quick family dinner, or a lunchbox favorite, these chicken fritters shine in every setting. Enjoy them straight from the skillet, or freeze and reheat for a fast, crowd-pleasing delight.
A Taste of Home and Nostalgia
Each golden fritter carries the comfort of childhood, the laughter of family gatherings, and the warmth of cherished memories—making this more than a recipe; it’s a tradition in every sense.
Essential Ingredients for Authentic Crispy Chicken Fritters
Core Ingredients
- 2 cups cooked chicken, finely shredded
- 1 cup all-purpose flour
- ½ cup grated Parmesan cheese
- ½ cup whole milk (or buttermilk for tanginess)
- 1 large egg, lightly beaten
- ¼ cup finely chopped onion
- 2 cloves garlic, minced
- 2 tablespoons fresh parsley, finely chopped
- 1 teaspoon baking powder
- ½ teaspoon paprika
- Salt and freshly ground black pepper, to taste
- Vegetable oil, for frying
Optional Flavor Boosters (“Grandma’s Touch”)
- 1 teaspoon Italian seasoning
- ¼ teaspoon cayenne pepper
- ½ cup shredded cheddar cheese
- 1 tablespoon chopped fresh dill
Step-by-Step Guide to Making Perfect Chicken Fritters
Step 1: Build the Flavor Base
Combine the shredded chicken with flour, Parmesan, onion, garlic, parsley, paprika, salt, and pepper. Mix thoroughly, ensuring that each piece of chicken is coated in the seasoned flour mixture.
Step 2: Prepare the Liquid Binder
Whisk together milk, egg, and baking powder until smooth. Pour this mixture over the dry ingredients and stir gently until a cohesive, sticky batter forms.
Step 3: Allow the Batter to Rest
Let the batter rest for 15–20 minutes. This crucial step allows the flavors to meld and the flour to hydrate fully, resulting in fritters that are lighter, more tender, and perfectly balanced.
Step 4: Heat and Prepare the Oil
Heat 1 inch of oil in a heavy skillet to 350°F (175°C). Maintain the temperature to ensure each fritter cooks to crispy perfection without absorbing excess oil.
Step 5: Fry to Golden-Brown Glory
Use two spoons to drop heaping tablespoons of batter into the hot oil. Gently flatten the tops for even cooking. Fry 2–3 minutes per side until deeply golden and crisp. Transfer to a wire rack to preserve the crunch.
Pro Kitchen Tips for Restaurant-Quality Results
Finely Shredded Chicken Creates Tender Fritters
Avoid chopping—shredding provides the soft, delicate texture that binds beautifully with the batter.
Control Oil Temperature With Precision
Overheated oil burns the exterior. Cool oil creates soggy fritters. Keep a thermometer on hand for consistent success.
Dip Spoons in Water Between Scoops
This ensures clean, smooth shaping and prevents batter from sticking.
Use a Wire Rack for Maximum Crispiness
Paper towels alone create steam; a rack keeps the bottom crisp and airy.
Dipping Sauces That Elevate Every Bite
Creamy Garlic Herb Dip
- ½ cup Greek yogurt
- ¼ cup mayonnaise
- 1 garlic clove, minced
- 1 tbsp each: dill, chives
Spicy Honey Mustard
- ¼ cup mayo + ¼ cup Greek yogurt
- 2 tbsp Dijon mustard
- 1 tbsp honey
- 1 tsp hot sauce
Smoky BBQ Ranch
- ½ cup ranch dressing
- 2 tbsp your favorite BBQ sauce
Bright Lemon Aioli
- ½ cup mayonnaise
- 1 garlic clove, minced
- 1 tbsp lemon juice
- 1 tsp lemon zest
Frequently Asked Questions About Chicken Fritters
Can they be baked instead of fried?
Yes—bake at 400°F (200°C) for 15–20 minutes, flipping halfway for even browning.
How do I keep them crispy for parties?
Place them on a wire rack in a 200°F (95°C) oven until serving. Avoid stacking or covering.
Can they be made ahead?
Absolutely. The batter stays fresh for 24 hours, and cooked fritters freeze beautifully.
What is the best chicken to use?
Rotisserie chicken delivers unbeatable flavor, but any cooked, finely shredded breast or thigh meat works perfectly.
Serving Ideas That Guarantee Family Applause
As a Show-Stopping Appetizer
Serve with a trio of dipping sauces and fresh herbs for presentation that impresses.
As a Hearty Main Course
Pair with mashed potatoes, roasted vegetables, or a crisp green salad.
As the Ultimate Game Day Snack
Make a double batch—they disappear fast!
For Lunchboxes and On-the-Go Meals
These fritters stay delicious even at room temperature, making them lunchbox-friendly.
Conclusion: A Recipe That Becomes Part of Your Family Story
These Crispy Chicken Fritters offer more than incredible flavor—they create moments. They gather families around the table, spark joy with every bite, and leave behind memories that endure for generations. Passed down with love, perfected over decades, and now shared for your own family to treasure, this is a recipe that truly stands the test of time.