
The Best Chocolate Buttermilk Cake: Moist, Velvety, and Perfect for Every Celebration
There are chocolate cakes, and then there is the chocolate cake that becomes the one friends request every year, the cake family members bring up long after the candles are blown out, the cake that becomes a signature. This Chocolate Buttermilk Cake fits that role effortlessly. Its tender, velvety crumb and rich cocoa flavor make it the kind of dessert that seems simple on the surface yet unforgettable in its depth. The secret lies in the duo of buttermilk and hot water, two ingredients that transform the cake into an incredibly moist bake with a texture that almost dissolves on the tongue. This recipe offers the perfect balance between homey comfort and polished bakery-style results, making it ideal for birthdays, holidays, casual family dinners, or any day when a chocolate craving calls for something truly satisfying.
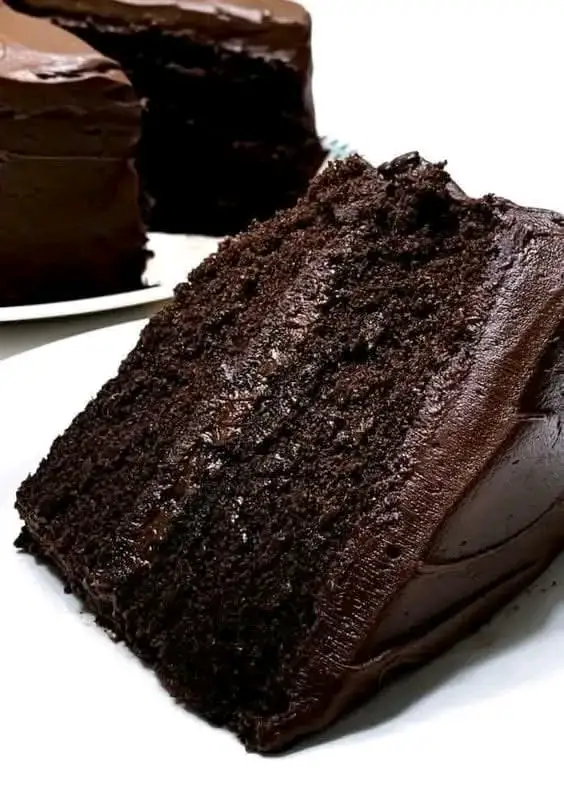
What sets this cake apart from many traditional chocolate cakes is its structure. Where some cakes lean dense, this one remains beautifully light without sacrificing richness. The combination of buttermilk and oil instead of butter produces a softer crumb, giving the cake a smooth and tender bite that stays moist for days. The addition of hot water deepens the cocoa flavor, blooming the chocolate and allowing it to deliver a more robust and layered taste. The frosting, a smooth chocolate buttermilk buttercream, echoes the cake’s flavor while adding a luscious creamy finish. Together, the cake and frosting create a dessert that feels balanced, never overly sweet yet fully indulgent.
This recipe is also incredibly reliable, which is one reason bakers of all skill levels love returning to it. It doesn’t require elaborate methods or advanced techniques. There is no need for complicated folding or precise tempering. Instead, it relies on simple mixing, which means even a beginner baker can produce a professional-quality cake. The batter comes together quickly, and the frosting requires only a few minutes of whipping to achieve a fluffy, silky texture. Because the batter is thin, it spreads easily into the pans and bakes evenly, making the finished layers perfectly level with no need for trimming. That ease is part of the charm: a cake that tastes exceptional without demanding elaborate work.
Before diving into the step-by-step instructions, it’s helpful to understand the role each ingredient plays. The flour forms the structure, while sugar sweetens and tenderizes. Cocoa powder provides the base chocolate flavor, baking powder and baking soda give lift, and salt highlights the sweetness while balancing the overall flavor profile. Buttermilk plays two roles: it activates the baking soda, and it softens the crumb. Vegetable oil adds moisture, eggs lend richness and stability, and vanilla enhances the chocolate aroma. The hot water brings everything together by blooming the cocoa powder, unlocking deeper, more intense flavor. The frosting mirrors these same elements: butter for creaminess, powdered sugar for sweetness, cocoa powder for flavor, buttermilk for smoothness and tang, and vanilla for warmth.
When preparing the pans, it is essential to grease them well and dust them with flour or use parchment liners. This ensures the delicate layers release easily without sticking. Because the batter is runnier than typical cake batters, having well-prepared pans prevents uneven edges. When the cakes come out of the oven, allowing them to cool for at least ten minutes before removing them prevents breakage. Once they cool completely on a wire rack, the layers become sturdy enough to frost without crumbling.
The frosting is a true complement to the cake. Instead of a heavy buttercream that might overwhelm the delicate crumb, this chocolate buttermilk frosting strikes a balance between richness and lightness. The buttermilk provides a gentle tang that cuts through the sweetness, making each bite feel smooth and balanced. The texture becomes airy once whipped, and it spreads easily across the cake layers. For those who prefer a thicker frosting, simply chill the frosting briefly before applying it. For a silkier finish, frost the cake immediately after mixing.
This recipe works equally well for special occasions and casual gatherings. It can be served as a simple layer cake, decorated with piped swirls, topped with berries, dusted with cocoa, or left plain for a minimalist look. It can also be made as cupcakes, a sheet cake, or even a bundt cake with slight adjustments. The versatility of the batter makes it a reliable base recipe for anyone who wants to experiment with fillings or frostings. Chocolate ganache pours beautifully over it, whipped cream pairs softly with its texture, and fruit fillings such as raspberry or cherry jam add a bright contrast.
One of the best features of this cake is how well it stores. Because the buttermilk and oil create lasting moisture, the cake does not dry out quickly. If kept covered at room temperature, it stays fresh for two days. If refrigerated, it lasts up to five days, though it should be brought to room temperature before serving for the best texture. The cake also freezes beautifully. You can freeze the layers individually before frosting, wrap them tightly, and store them for up to three months. When ready to use, simply thaw, frost, and assemble.
Below is the full recipe presented in a clean format suitable for any food website.
Chocolate Buttermilk Cake Recipe
Ingredients
For the Cake:
2 cups all-purpose flour
2 cups granulated sugar
3/4 cup unsweetened cocoa powder
2 teaspoons baking powder
1 1/2 teaspoons baking soda
1 teaspoon salt
1 cup buttermilk, at room temperature
1/2 cup vegetable oil
2 large eggs, at room temperature
2 teaspoons vanilla extract
1 cup hot water
For the Frosting:
1 cup unsalted butter, softened
3 1/2 cups powdered sugar
1/2 cup unsweetened cocoa powder
1/2 cup buttermilk, at room temperature
2 teaspoons vanilla extract
Pinch of salt
Instructions
- Preheat your oven to 350°F (175°C). Grease and flour two 9-inch round cake pans. You may also line the bottoms with parchment paper for easier removal, especially since the batter is thin and produces delicate layers.
- In a large mixing bowl, whisk together the flour, granulated sugar, cocoa powder, baking powder, baking soda, and salt. Make sure the cocoa powder is thoroughly incorporated, breaking up any clumps so the dry mixture becomes smooth and uniform.
- Add the buttermilk, vegetable oil, eggs, and vanilla extract to the dry ingredients. Using a hand mixer or stand mixer, blend the mixture on medium speed until the batter is mostly smooth and well combined. Do not overmix; just ensure the ingredients come together evenly.
- Gradually add the hot water to the bowl. Pour it slowly, mixing on low speed to avoid splashing. As the water blends in, the batter will become noticeably thinner. This is intentional and contributes to the cake’s moist, tender texture.
- Divide the batter evenly between the two prepared cake pans. Tap the pans gently on the counter to release any air bubbles and to help the batter settle.
- Bake the cakes for 30–35 minutes. Begin checking at the 30-minute mark. Insert a toothpick into the center of each cake; if it comes out clean or with a few moist crumbs, the cake is done. Avoid overbaking, as that can lead to dryness.
- Allow the cakes to cool in their pans for ten minutes. Then carefully run a knife along the edges to loosen them before flipping them onto wire racks to cool completely. Ensure the layers are fully cooled before frosting to prevent melting.
- To make the frosting, beat the softened butter in a large mixing bowl using a stand mixer or hand mixer until the texture becomes light, creamy, and pale. This typically takes two to three minutes.
- Gradually add the powdered sugar and cocoa powder. Add a small amount at a time to avoid creating a cloud of sugar. Mix on medium speed until fully incorporated and smooth.
- Add the buttermilk, vanilla extract, and pinch of salt. Beat the mixture on medium-high speed until it becomes fluffy, velvety, and easy to spread. If the frosting appears too thick, add a teaspoon of buttermilk at a time until the desired consistency is reached. If too thin, add a small amount of powdered sugar.
- Once the cake layers have cooled completely, place one layer on a serving plate. Spread a generous amount of frosting over the top, covering the surface evenly.
- Place the second cake layer on top and press gently to secure it. Frost the top and sides, smoothing with a spatula or swirling for texture, depending on your preferred design.
- Let the cake rest for at least twenty minutes before slicing. This allows the frosting to settle and makes cleaner slices.
Serving Suggestions
This cake pairs beautifully with fresh berries, whipped cream, or a drizzle of warm chocolate sauce. For a more dramatic presentation, garnish with chocolate curls or sift a thin layer of cocoa over the top. It also works well with espresso or strong coffee, as the flavors complement the deep chocolate notes.
Storage Tips
Store the cake covered at room temperature for up to two days or in the refrigerator for up to five days. For longer storage, freeze the cake unfrosted or frosted. Wrap tightly in plastic wrap and place in an airtight container. Thaw in the refrigerator overnight and allow to reach room temperature before serving.