
Crunchy, Creamy, and Irresistibly Chocolatey!
There’s something magical about the combination of crunchy Butterfinger candy, creamy peanut butter, and smooth melted chocolate. These Butterfinger Balls are the ultimate no-bake treat — bite-sized indulgence that’s perfect for parties, holidays, or satisfying your sweet cravings any time of the year. With just a handful of ingredients and a simple process, you’ll have a dessert that everyone will beg you to make again.
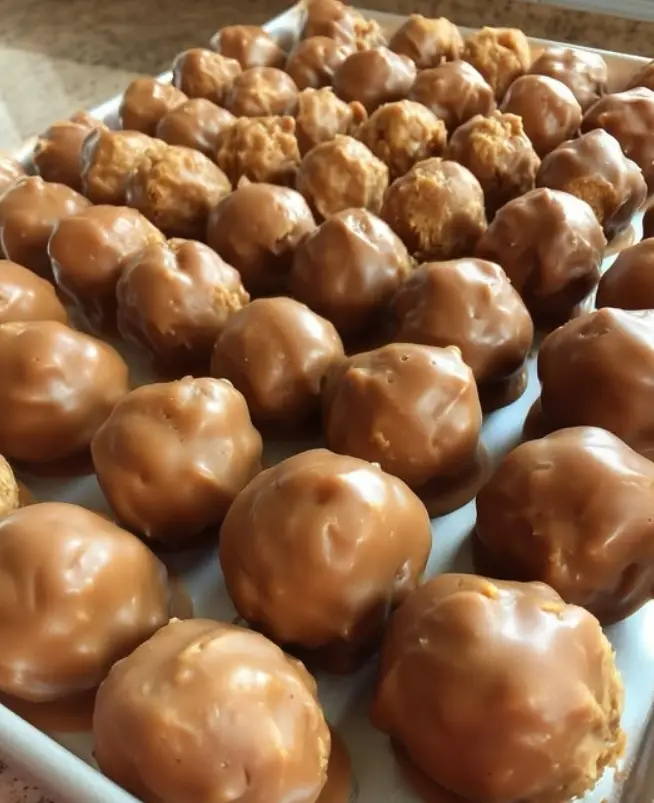
What Are Butterfinger Balls?
Butterfinger Balls are delicious, no-bake dessert bites made with crushed Butterfinger candy bars, peanut butter, butter, and powdered sugar, all coated in a layer of rich melted chocolate. They’re similar to Buckeyes or peanut butter truffles, but the addition of Butterfinger pieces gives them that signature crunchy texture and caramelized flavor we all know and love.
Whether you serve them chilled for a cool treat or at room temperature for a soft, melt-in-your-mouth bite, these little spheres of joy never disappoint.
Ingredients You’ll Need
To make approximately 24 Butterfinger Balls, you’ll need:
- 2 cups crushed Butterfinger candy bars
- 1 cup creamy peanut butter
- ½ cup unsalted butter, softened
- 2 cups powdered sugar
- 2 cups semi-sweet chocolate chips
- 1 tablespoon vegetable oil or coconut oil (for smooth chocolate melting)
Optional Toppings:
- Extra crushed Butterfinger for garnish
- A drizzle of melted peanut butter
Every ingredient plays its part — the Butterfinger adds crunch, the peanut butter adds creaminess, and the chocolate seals the deal for that rich, dessert perfection.
Step-by-Step Instructions for Perfect Butterfinger Balls
1️⃣ Mix the Base
Start by crushing the Butterfinger candy bars into small pieces. In a large mixing bowl, combine the crushed Butterfinger, creamy peanut butter, softened butter, and powdered sugar. Mix until everything comes together into a smooth, thick dough. The mixture should be pliable enough to roll into balls but not sticky.
2️⃣ Shape the Balls
Use a small cookie scoop or spoon to portion the dough into 1-inch balls. Roll them between your hands until smooth. Line a baking sheet with parchment paper and place the balls evenly spaced apart.
3️⃣ Chill to Firm
Refrigerate the tray for at least 30 minutes. Chilling the balls ensures they hold their shape and don’t crumble when dipped in chocolate. For best results, you can also pop them in the freezer for 10-15 minutes.
4️⃣ Melt the Chocolate
In a microwave-safe bowl, add the chocolate chips and oil. Heat in 30-second intervals, stirring in between, until smooth and glossy. Be careful not to overheat — chocolate can seize if it gets too hot.
5️⃣ Dip and Coat
Using a fork or dipping tool, gently lower each chilled ball into the melted chocolate. Roll to coat evenly, then lift and allow the excess to drip off. Place each coated ball back onto the parchment-lined tray.
6️⃣ Set the Chocolate
Let the chocolate coating set at room temperature or return the tray to the refrigerator for 15–20 minutes to speed up the process. Once firm, they’re ready for garnishing.
7️⃣ Garnish and Serve
Drizzle extra melted peanut butter or sprinkle crushed Butterfinger pieces over the top for a finishing touch. Serve immediately or store them for later — they’re delicious both ways!
Expert Tips for the Best Butterfinger Balls
- Chill before dipping: This prevents the balls from falling apart when submerged in melted chocolate.
- Use no-stir peanut butter: Natural peanut butter tends to be oily and can affect texture.
- Control chocolate thickness: If your melted chocolate feels too thick, add a few drops of oil to thin it.
- Decorate for occasions: Add colored sprinkles or drizzle white chocolate for festive holidays.
These little details make your Butterfinger Balls look professional and taste absolutely divine.
Why You’ll Love This Recipe
- No Baking Required: Skip the oven and keep things cool and easy.
- Quick and Simple: Ready in under an hour with minimal mess.
- Perfect for Any Occasion: Ideal for holidays, birthdays, or as edible gifts.
- Rich, Crunchy, and Creamy: Every bite delivers the perfect balance of flavors and textures.
Once you make these, they’ll become your go-to dessert for parties and sweet cravings alike.
How to Store Butterfinger Balls
To keep your Butterfinger Balls fresh and delicious:
- Refrigerator: Store in an airtight container for up to 2 weeks.
- Freezer: Freeze for up to 2 months in a freezer-safe container. Let thaw in the fridge before serving.
For best texture, enjoy them slightly chilled — the chocolate stays firm while the inside remains creamy and flavorful.
Fun Flavor Variations
Give your Butterfinger Balls a personal touch with these creative variations:
- White Chocolate Butterfinger Balls: Swap semi-sweet chocolate for white chocolate for a sweeter twist.
- Crunchy Peanut Butter Version: Use crunchy peanut butter for added texture.
- Cookie Crumble Mix: Add crushed vanilla wafers or graham crackers to the mixture.
- Holiday Edition: Mix in a pinch of cinnamon or pumpkin spice during fall and winter.
- Salted Caramel Drizzle: Top with a thin stream of salted caramel for extra decadence.
Experiment with your favorite flavors — there’s no wrong way to make these delicious bites!
Nutritional Information (Per Ball, Approximate)
- Calories: 180
- Carbohydrates: 16g
- Fat: 12g
- Sugar: 14g
- Protein: 2g
While these aren’t exactly diet food, they’re a perfect indulgence in moderation. Each bite is packed with peanut butter protein and that iconic Butterfinger crunch.
Common Questions About Butterfinger Balls
Can I use natural peanut butter?
Yes, but the texture may be a bit softer. We recommend a creamy, no-stir variety for best results.
Can I use different types of chocolate?
Absolutely! Try dark chocolate for a richer flavor or white chocolate for a sweeter contrast.
Why did my balls fall apart during dipping?
They weren’t chilled long enough. Next time, refrigerate or freeze before dipping.
Can I make them ahead of time?
Yes! Butterfinger Balls are great make-ahead treats — perfect for busy schedules or event prep.
Serving Ideas
Butterfinger Balls make a versatile dessert. Here are some fun ways to serve them:
- Holiday Dessert Trays: Combine them with other bite-sized treats for variety.
- Party Favors: Wrap in clear bags or small jars for edible gifts.
- Sweet Snack: Keep a few in the fridge for an instant sugar fix.
- Dessert Board Addition: Pair with cookies, pretzels, and fruit for an indulgent dessert platter.
Their beautiful presentation and irresistible flavor make them a crowd-pleasing addition to any occasion.
Final Thoughts: The Ultimate No-Bake Treat
These Butterfinger Balls are the definition of dessert perfection — no baking, no stress, and no leftovers guaranteed. With their sweet, nutty, and chocolatey balance, they deliver an unforgettable flavor that keeps everyone coming back for more. Whether you’re preparing them for a special occasion or just because you deserve a treat, one thing’s for sure — you’ll never lose this recipe once you’ve tried it!