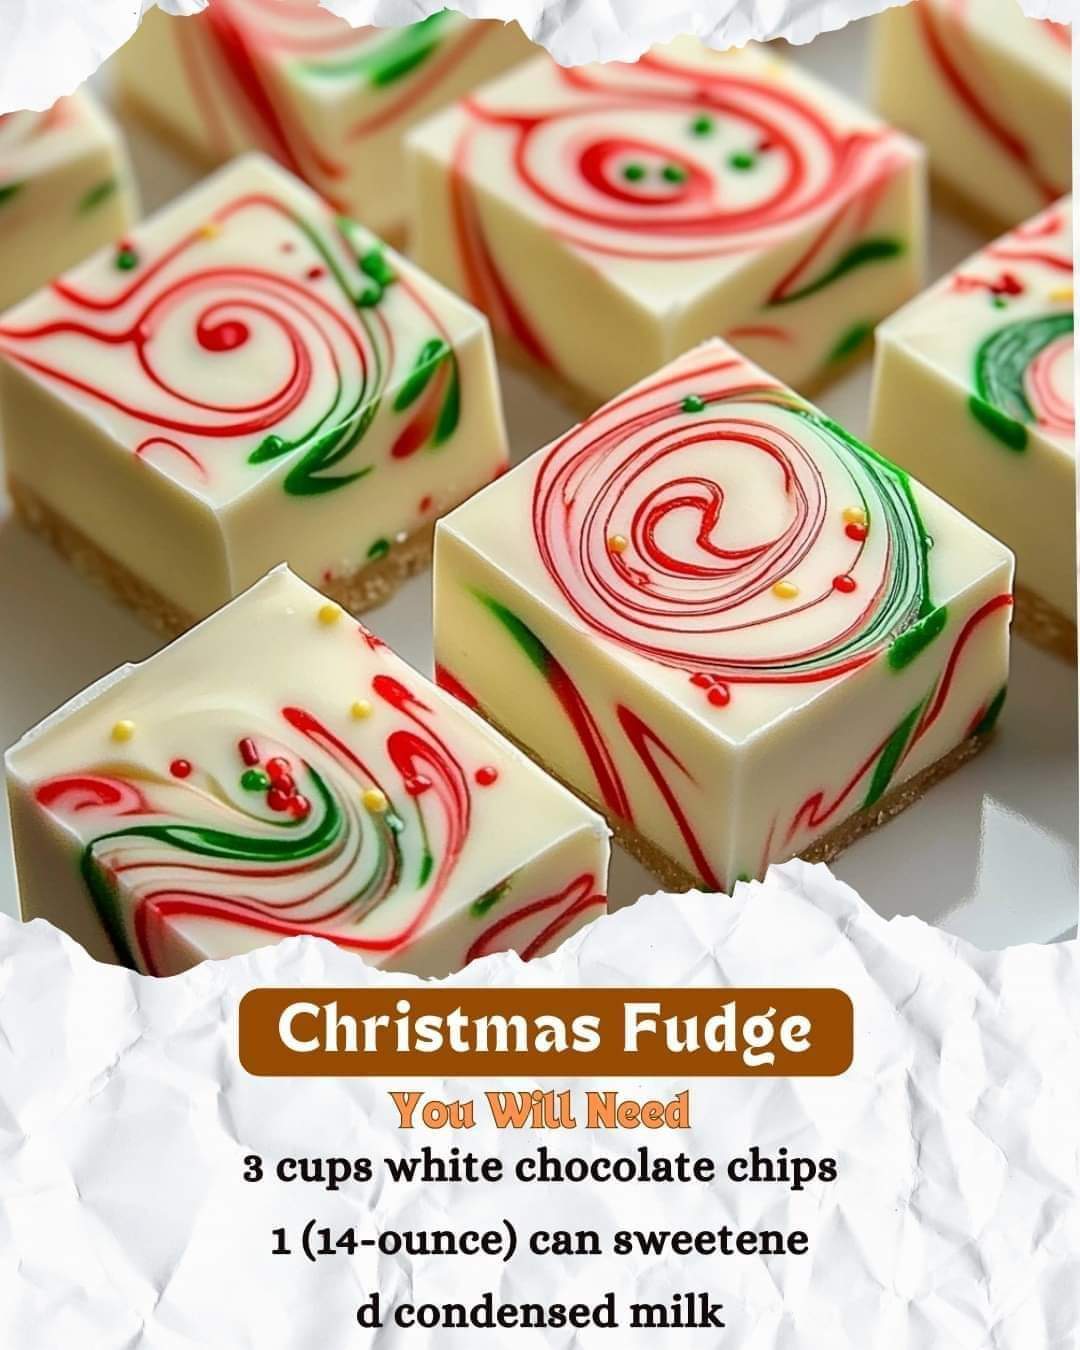
The holidays are all about creating memories with loved ones, and nothing says Christmas quite like the joy of indulging in a sweet, homemade treat. This Christmas Fudge Delight is more than just a dessert; it’s a slice of tradition that brings the magic of the season to your table. Whether you’re hosting a holiday party, gifting treats to friends, or enjoying quiet family moments, this colorful fudge is the perfect addition.
With its vibrant red, green, and white hues and rich, creamy texture, this fudge not only tastes heavenly but also looks stunning on any dessert platter. Let’s recreate this classic Christmas treat and make your holiday celebrations even sweeter!
Introduction: A Sweet Tradition
For many, the holiday season isn’t complete without an array of festive desserts. Growing up, our Christmas gatherings always included a plate of colorful fudge that instantly brightened up the table. The swirl of red and green combined with the creamy sweetness of white chocolate made it a favorite among kids and adults alike.
Now, I’m excited to share this cherished recipe with you. It’s simple to make, requires just a few ingredients, and guarantees smiles all around. This fudge isn’t just a treat; it’s a piece of holiday magic that brings families together.
The Origin of Holiday Fudge
Fudge as we know it originated in the late 19th century, and its simplicity quickly made it a favorite treat. By the time it became a holiday staple, families had started adding festive touches, like colorful layers and sprinkles, to make it stand out during Christmas celebrations.
Christmas fudge is not just about satisfying a sweet tooth—it’s a symbol of love, sharing, and togetherness. This recipe honors that tradition while adding a fun and vibrant twist, perfect for spreading holiday cheer.
Ingredients: What You’ll Need
Here’s a breakdown of the ingredients for this delightful Christmas fudge:
Main Ingredients:
- White Chocolate Chips (3 cups): The base of this fudge, creating a smooth and creamy texture.
- Sweetened Condensed Milk (1 14-ounce can): Adds sweetness and helps the fudge set properly.
- Vanilla Extract (½ tsp): Enhances the flavor with a subtle aromatic touch.
Festive Touches:
- Red and Green Food Coloring: These bring the holiday spirit to life with vibrant colors.
- Holiday Sprinkles (¼ cup, optional): Add a festive flair and crunch to the top layer.
Tips for Success
- Use High-Quality Chocolate Chips: For the best flavor and texture, choose high-quality white chocolate chips that melt easily.
- Line Your Pan Properly: Parchment paper is a must for easy removal. Leave extra paper hanging over the edges for effortless lifting.
- Work Quickly with Colors: The fudge mixture sets quickly, so divide and color it immediately after melting for smoother layering.
- Create Swirls with Care: Use a toothpick or knife to gently swirl the colors together for a marbled effect without overmixing.
- Chill Completely: Give the fudge at least 2 hours in the refrigerator to set fully before cutting.
Step-by-Step Instructions
1. Prepare the Pan:
Line an 8×8-inch baking dish with parchment paper, leaving enough overhang on the sides to lift the fudge out easily once it’s set.
2. Melt the Chocolate Mixture:
In a medium saucepan, combine the white chocolate chips and sweetened condensed milk. Heat over low, stirring continuously, until the mixture is completely melted and smooth. Remove from heat and stir in the vanilla extract.
3. Divide and Color:
Divide the melted fudge mixture evenly into three bowls. Add a few drops of red food coloring to one bowl and green food coloring to another, leaving the third bowl plain. Stir each bowl until the colors are evenly mixed.
4. Layer and Swirl:
Pour the red mixture into the prepared pan and spread it evenly. Add the plain (white) layer on top, followed by the green layer. Use a toothpick or knife to create gentle swirls for a marbled effect.
5. Decorate with Sprinkles:
If using holiday sprinkles, scatter them over the top while the fudge is still soft. Press gently to ensure they stick.
6. Chill and Set:
Place the pan in the refrigerator and chill for at least 2 hours, or until the fudge is firm to the touch.
7. Slice and Serve:
Once set, lift the fudge out of the pan using the parchment paper overhang. Cut into small squares and serve or store in an airtight container.
Description of the Final Treat
The finished Christmas Fudge Delight is as delightful to look at as it is to taste. Each square boasts layers of vibrant red, green, and creamy white, swirled together like a festive candy cane. The sprinkles on top add a playful touch, making it perfect for both kids and adults.
The texture is rich and velvety, melting in your mouth with every bite. The sweetness of the white chocolate is perfectly balanced by the subtle vanilla, creating a harmonious flavor that screams holiday joy.
Nutritional Information
Here’s an approximate breakdown per serving (based on 16 servings):
- Calories: ~180
- Fat: 8g
- Carbohydrates: 24g
- Protein: 2g
- Sugar: 20g
Conclusion: A Festive Treat to Remember
Christmas Fudge Delight is more than just a dessert—it’s a way to bring the holiday spirit to life. It’s a recipe that’s easy to make yet leaves a lasting impression, whether you’re serving it at a holiday party, gifting it to loved ones, or enjoying it with family by the fireplace.
Make It Your Tradition
Why not make this fudge a part of your annual Christmas tradition? Involve the kids in layering and swirling the colors, and watch as their eyes light up with excitement. The memories created in the kitchen are often sweeter than the treats themselves.
So, gather your ingredients, roll up your sleeves, and let this Christmas Fudge Delight bring joy, warmth, and sweetness to your holiday season.

