
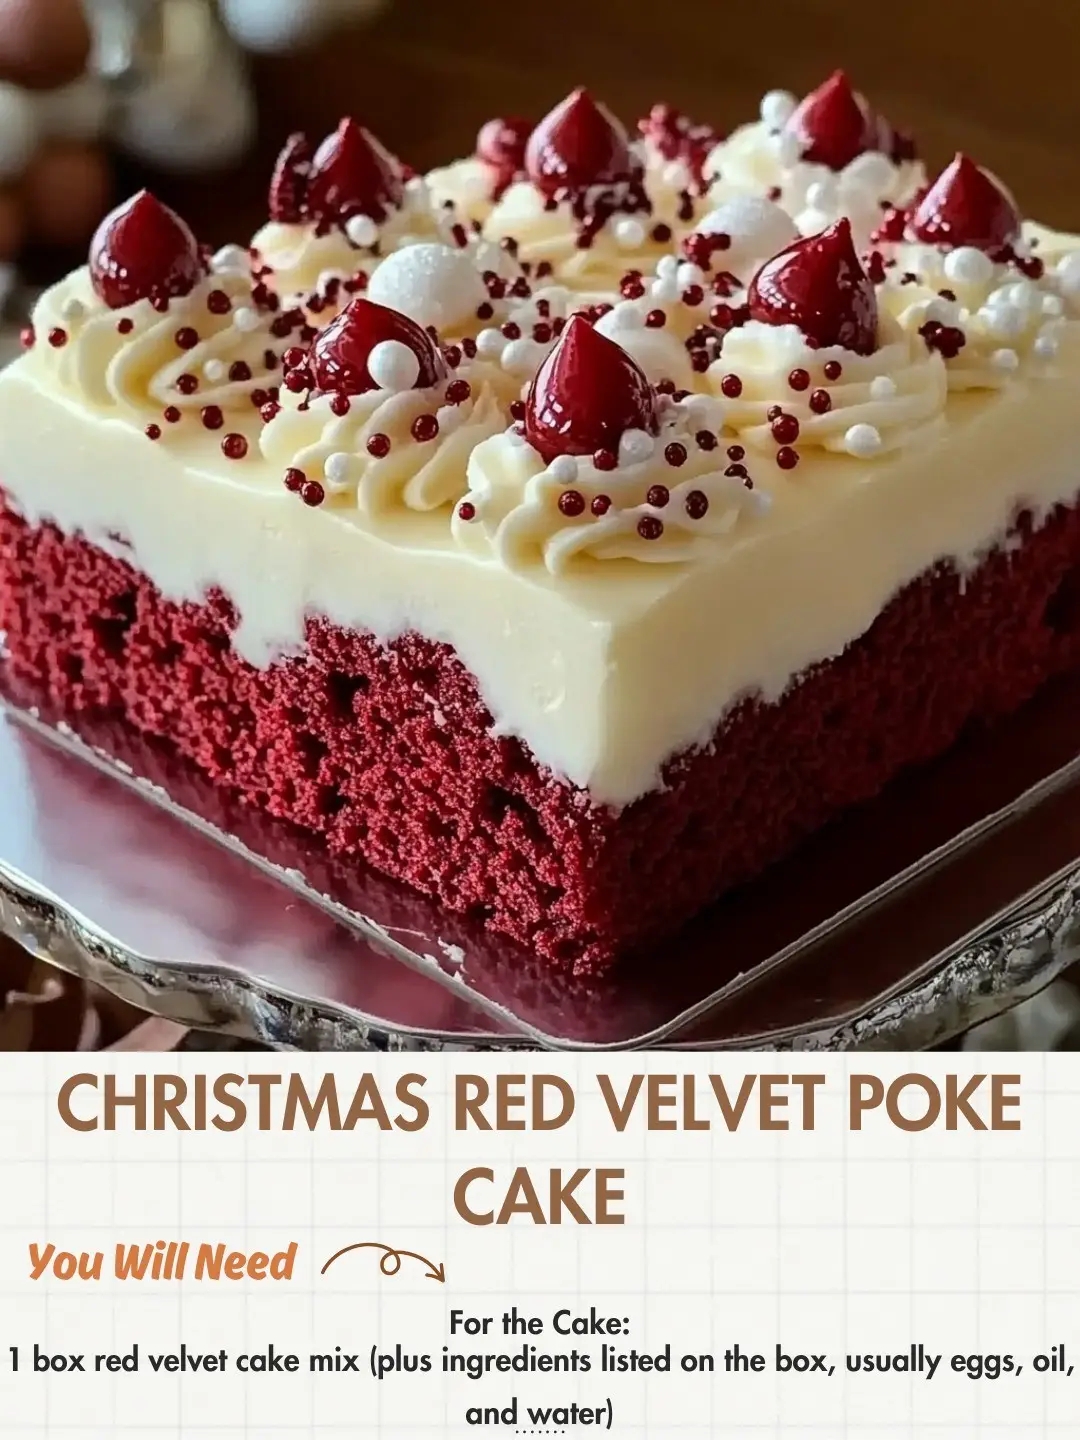
Christmas Red Velvet Poke Cake Recipe: A Festive Favorite for the Holidays
If you’re looking for a showstopping dessert that combines rich flavor, creamy texture, and holiday cheer, this Christmas Red Velvet Poke Cake is the ultimate treat. With its vibrant red hue, luscious white chocolate filling, and fluffy cream cheese topping, it’s a crowd-pleaser that looks as good as it tastes. Whether you’re hosting a holiday party, contributing to a potluck, or simply indulging in seasonal baking, this cake is guaranteed to steal the spotlight.
Why You’ll Love This Recipe
- Festive and eye-catching: The deep red velvet base paired with snowy white topping and colorful sprinkles makes it perfect for Christmas.
- Easy to make: Uses boxed cake mix for convenience, with simple steps that even beginner bakers can follow.
- Decadent flavor: Sweetened condensed milk and melted white chocolate soak into the cake, creating a moist, rich texture.
- Make-ahead friendly: Can be prepared a day in advance and stored in the fridge until serving.
Ingredients
For the Cake:
- 1 box red velvet cake mix (plus ingredients listed on the box — typically eggs, oil, and water)
- 1 (14 oz) can sweetened condensed milk
- 1 cup white chocolate chips, melted
For the Topping:
- 1 (8 oz) package cream cheese, softened
- 1 (8 oz) tub whipped topping (like Cool Whip), thawed
- 1 teaspoon vanilla extract
- ½ cup powdered sugar
Optional Decorations:
- Festive sprinkles
- Crushed peppermint candies
- Mini marshmallows
- White chocolate curls
- Red and green M&Ms
Step-by-Step Instructions
- Prepare and Bake the Cake
Start by preheating your oven according to the instructions on your red velvet cake mix box — usually 350°F (175°C). Lightly grease a 9×13-inch baking dish with nonstick spray or butter.
In a large mixing bowl, prepare the cake batter as directed on the box. This typically involves combining the cake mix with eggs, oil, and water. Use a hand mixer or stand mixer to beat the batter until smooth and lump-free.
Pour the batter into your prepared baking dish and spread it evenly. Bake according to the package instructions, usually 30–35 minutes, or until a toothpick inserted into the center comes out clean.
Once baked, remove the cake from the oven and allow it to cool for about 10 minutes. The cake should still be warm but not hot when you move on to the next step.
- Poke the Cake
Using the handle of a wooden spoon (or a similar-sized utensil), poke holes all over the surface of the cake. Space them about 1 inch apart. These holes will allow the filling to seep into the cake, creating pockets of creamy sweetness in every bite.
Make sure to poke deep enough to reach the bottom of the cake, but avoid tearing it apart. You want clean, evenly spaced holes that will hold the filling.
- Add the Sweetened Condensed Milk and White Chocolate
In a small bowl, combine the sweetened condensed milk and melted white chocolate chips. Stir until the mixture is smooth and glossy. If your white chocolate is too thick, you can microwave it for 10–15 seconds to loosen it up.
Pour the mixture slowly and evenly over the cake, making sure it fills the holes. Use a spatula to gently spread the mixture across the surface, encouraging it to seep into the cake.
Let the cake sit at room temperature for at least 30 minutes to absorb the filling. Then transfer it to the refrigerator to cool completely — about 1 to 2 hours.
- Prepare the Cream Cheese Topping
In a medium mixing bowl, beat the softened cream cheese until smooth and creamy. Add the powdered sugar and vanilla extract, and continue beating until well combined.
Gently fold in the thawed whipped topping using a spatula. Mix until the topping is light, fluffy, and evenly blended. Be careful not to overmix — you want to preserve the airy texture of the whipped topping.
- Frost the Cake
Once the cake is fully cooled and the filling has set, spread the cream cheese topping evenly over the surface. Use a spatula or offset knife to create a smooth, thick layer.
This creamy topping adds a tangy contrast to the sweet cake and filling, balancing the flavors beautifully.
- Decorate with Holiday Cheer
Now comes the fun part — decorating! Sprinkle festive holiday-themed decorations over the top of the cake. You can use:
- Red and green sprinkles
- Crushed peppermint candies
- Mini marshmallows
- White chocolate curls
- Edible glitter
- Red and green M&Ms
Get creative and make it your own. This is a great activity for kids or guests to join in on.
- Chill and Serve
For best results, chill the cake for at least 30 minutes before slicing. This helps the topping set and makes the cake easier to cut.
Slice into squares and serve cold. Each bite delivers a perfect blend of moist red velvet cake, creamy white chocolate filling, and fluffy cream cheese topping — all wrapped in holiday joy.
Tips for Success
- Use full-fat cream cheese for the richest flavor and smoothest texture.
- Don’t skip the chilling time. It helps the filling set and enhances the flavor.
- Make it ahead: This cake tastes even better the next day, making it ideal for holiday prep.
- Customize the topping: Add a dash of peppermint extract or a swirl of raspberry jam for a twist.
Serving Suggestions
This cake pairs beautifully with:
- Hot cocoa or peppermint mocha
- A scoop of vanilla ice cream
- Fresh berries or berry compote
- A drizzle of chocolate or caramel sauce
Serve it as a centerpiece dessert at your Christmas dinner, or bring it to a cookie exchange or office party. It’s guaranteed to be a hit.
Storage and Make-Ahead Tips
- Refrigeration: Store leftovers in an airtight container in the fridge for up to 5 days.
- Freezing: You can freeze the cake (without toppings) for up to 2 months. Thaw overnight in the fridge and add the topping before serving.
- Make-ahead: Bake and fill the cake a day in advance, then frost and decorate the day of your event.
Final Thoughts
This Christmas Red Velvet Poke Cake is more than just a dessert — it’s a celebration of the season. With its rich flavor, festive colors, and creamy topping, it brings joy to every table. Whether you’re baking for family, friends, or just yourself, this cake is a delicious way to spread holiday cheer.
So grab your mixing bowl, turn on your favorite Christmas playlist, and get ready to bake a cake that’s as merry and bright as the season itself.