
🍰 Coconut Cream Dream Cake: A Tropical
Indulgence Worth Savoring
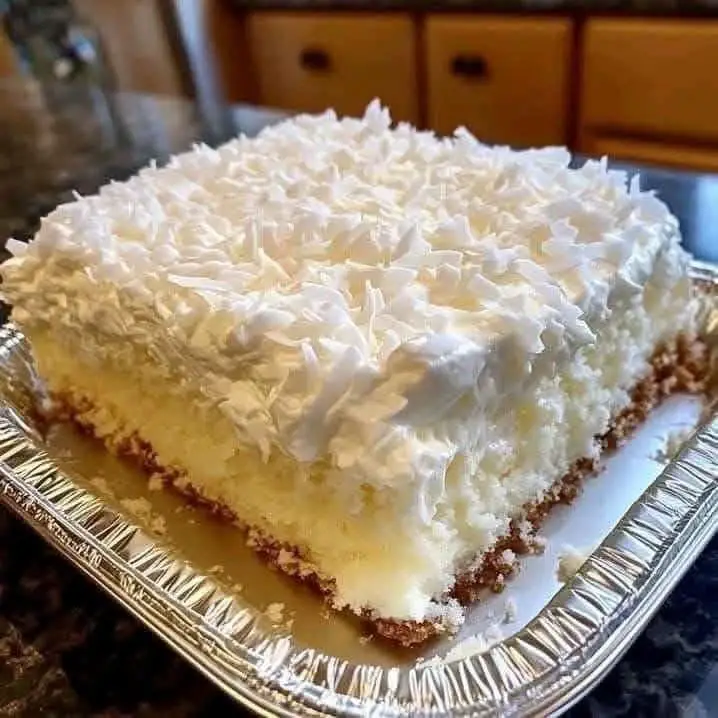
If you’ve ever dreamed of a dessert that feels like a tropical vacation in every bite, the Coconut Cream Dream Cake is your answer. This luscious, creamy, and coconut-packed cake is a celebration of texture and flavor. It’s soft, rich, and soaked in a decadent blend of cream of coconut and sweetened condensed milk, then topped with a cloud of Extra Creamy Cool Whip and a snowy layer of grated coconut. Whether you’re preparing it for a festive gathering or a quiet weekend treat, this cake delivers comfort and luxury in equal measure.
This recipe is a beautiful fusion of convenience and indulgence. It uses pantry staples like boxed cake mix and pudding to create a moist, flavorful base, while the topping transforms it into something truly special. The result is a dessert that feels gourmet but is incredibly easy to make. It’s perfect for busy bakers who want to impress without spending hours in the kitchen.
In this post, we’ll walk through every step of the process—from ingredients and preparation to tips for success and nutritional insights. You’ll learn how to make this cake your own, whether you stick to the classic version or add your own creative twist. Let’s dive into the delicious world of coconut dreams.
🧁 Ingredients: Simple Staples, Big Flavor
The magic of this cake lies in its simplicity. Each ingredient plays a vital role in creating the perfect balance of sweetness, texture, and tropical flair. The cake base is soft and tender, thanks to the pudding mix and milk, while the topping adds creamy richness and a burst of coconut flavor.
Using a boxed cake mix saves time and ensures consistency, but the addition of eggs, milk, and pudding elevates it to a homemade level. The extract—whether vanilla or almond—adds depth and aroma, making the cake more fragrant and flavorful. Choose almond for a nutty twist or vanilla for a classic touch.
The topping is where the magic happens. Cream of coconut and sweetened condensed milk create a luxurious soak that infuses the cake with moisture and sweetness. Cool Whip adds a light, airy contrast, and the grated coconut provides texture and visual appeal. Together, they create a dessert that’s both comforting and elegant.
📋 For the Cake
1 box white cake mix (Duncan Hines recommended for best texture)
3 large eggs (room temperature for better incorporation)
1 cup milk (whole milk preferred for richness)
½ cup vegetable oil (neutral flavor, helps keep the cake moist)
1 small box vanilla or almond pudding mix (adds moisture and flavor depth)
1 teaspoon vanilla or almond extract (choose based on your flavor preference)
🥥 For the Topping
1 can cream of coconut (not coconut milk—this is thicker and sweeter)
1 can sweetened condensed milk (adds richness and sweetness)
8 ounces Extra Creamy Cool Whip (for a smooth, airy topping)
12 ounces frozen grated coconut (thawed before use for easy sprinkling)
👨🍳 Instructions: Step-by-Step to Coconut Bliss
- Prepare the Cake
Begin by preheating your oven according to the instructions on the cake mix box. This ensures your cake bakes evenly and rises properly. In a large mixing bowl, combine the white cake mix, eggs, milk, vegetable oil, pudding mix, and your chosen extract. Mix thoroughly until the batter is smooth and lump-free. The pudding mix adds moisture and a velvety texture, while the extract enhances the flavor profile. - Bake
Grease a 9×13-inch baking pan generously to prevent sticking. Pour the batter into the pan and spread it evenly. Bake according to the package instructions, usually around 30–35 minutes, or until a toothpick inserted into the center comes out clean. The cake should be golden and springy to the touch. - Soak with Coconut Cream
While the cake is still warm, use a fork to poke holes all over the surface. This step is crucial—it allows the topping to seep into the cake, infusing it with flavor and moisture. In a separate bowl, mix the cream of coconut with the sweetened condensed milk until fully blended. Pour this mixture slowly and evenly over the cake, letting it absorb into the holes. The result is a rich, custard-like texture that makes every bite irresistible. - Top with Cool Whip & Coconut
Once the cake has cooled to room temperature, spread a generous layer of Extra Creamy Cool Whip across the top. This adds a light, creamy contrast to the dense, moist cake beneath. Then, sprinkle the thawed grated coconut evenly over the Cool Whip. The coconut adds texture, flavor, and a beautiful snowy finish that makes the cake visually stunning. - Refrigerate
Cover the cake with plastic wrap or foil and refrigerate for at least 4 hours. Overnight is even better, as it allows the flavors to meld and the topping to set. The chilling process enhances the cake’s texture and makes it easier to slice cleanly. - Serve
Once fully chilled, slice the cake into squares and serve. Each piece will be rich, creamy, and bursting with coconut flavor. It’s perfect on its own or paired with a cup of coffee or tropical fruit. This cake is guaranteed to impress guests and satisfy cravings.