
Homemade English Toffee Recipe: A Family Tradition Passed Down for Generations
There are certain recipes that stand the test of time—not just because they taste amazing, but because they carry with them a sense of family, tradition, and nostalgia. For me, English toffee is one of those treasured recipes. My love for this treat began during childhood when my aunt made the best English toffee every holiday season. I can still remember the warm smell of butter and sugar bubbling away on her stovetop and the joy of sneaking a bite before it was packaged into festive tins for family and friends.
When I got married over twenty years ago, one of the first recipes I asked my aunt to share with me was her toffee. I wanted to make sure the tradition lived on in my own family. Now, more than two decades later, I’ve made dozens and dozens of batches—sometimes so many during the holidays that I lose count. And every single time I share it, whether with neighbors, coworkers, or relatives, I am asked for the recipe.
Unfortunately, because this recipe is so popular, it has often been stolen and reposted by spam accounts online. But make no mistake—this recipe comes straight from my family, originally shared with me by my aunt, and now lovingly passed down to you. If you’ve been looking for a foolproof, delicious, and timeless English toffee recipe, you’re in the right place.
What Makes This English Toffee Special
English toffee recipes are plentiful, but not all are created equal. Some require candy thermometers, others use corn syrup, and many can be overly complicated. What makes this recipe so special is its simplicity. With just four basic ingredients—butter, sugar, a pinch of salt, and vanilla—you can create a rich, buttery, crunchy toffee that tastes like it came from a high-end candy shop.
Another unique feature of this recipe is that it doesn’t require a candy thermometer. While some candy recipes live and die by precise temperature readings, this one relies on your eyes. You’ll cook the mixture until it reaches the color of a brown paper bag, which is about five minutes on medium-high heat. This visual cue takes the guesswork out and makes it approachable even for beginners.
And of course, what makes this recipe truly special is the tradition behind it. It’s not just candy—it’s a memory, a gift, and a way of connecting generations through the simple act of cooking and sharing something sweet.
The Ingredients
Here’s what you’ll need for a batch of homemade English toffee:
- 1 cup butter – Use real butter for the best flavor. Unsalted butter is preferred so you can control the salt level.
- 1 cup sugar – Regular granulated sugar works perfectly.
- Pinch of salt – Enhances the flavor and balances the sweetness.
- ½ teaspoon vanilla extract – Adds depth and warmth.
Optional additions:
- Nuts – I love pouring the toffee over whole almonds, but you can use pecans, walnuts, or leave them out entirely.
- Chocolate – Milk chocolate chips, semi-sweet chocolate chips, or melting wafers. I often use Ghirardelli melting chocolates for a smooth, professional finish.
Step-by-Step Instructions
Step 1: Prepare Your Pan
Line a baking sheet with foil or parchment paper. If you’re using nuts, spread them out evenly across the pan. This will create a delicious base for your toffee.
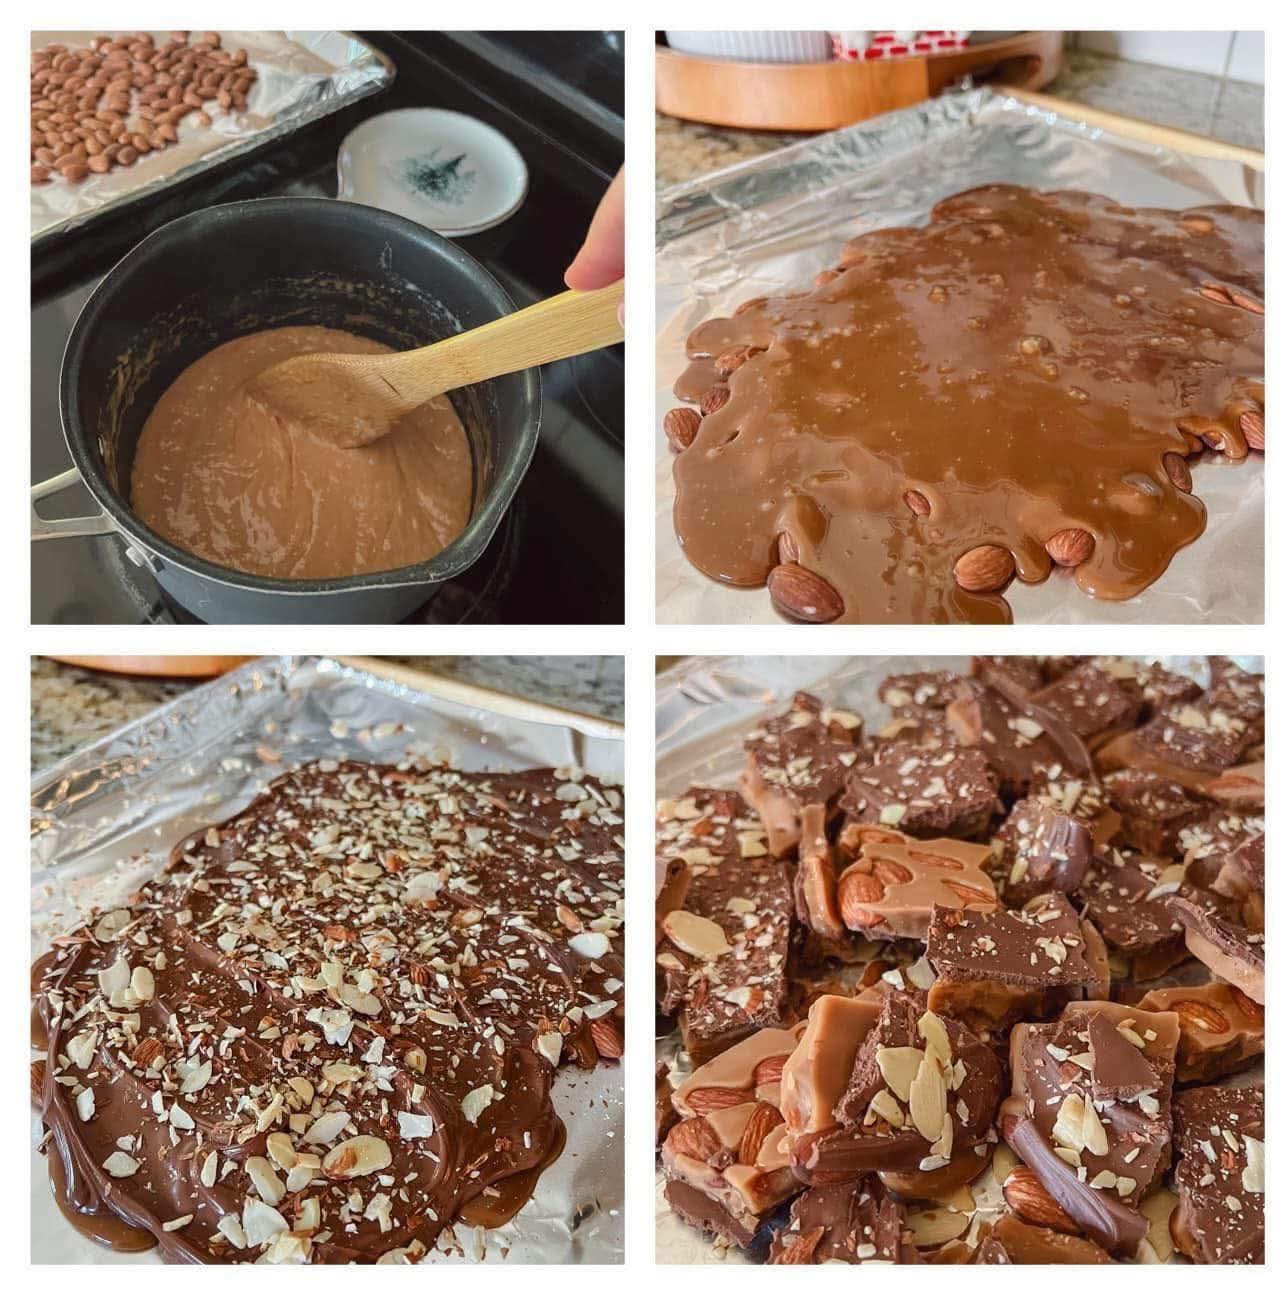
Step 2: Cook the Toffee
In a medium saucepan, combine the butter, sugar, and a pinch of salt. Set the heat to medium-high and stir constantly with a wooden spoon. The mixture will bubble and change in texture as it cooks.
After about five minutes, it should reach the color of a brown paper bag—this is your cue that it’s ready. At this point, stir in the vanilla extract.
Step 3: Pour Over Nuts
Quickly and carefully pour the hot toffee mixture over the nuts on your prepared baking sheet. Use a spatula to spread it out evenly if needed. Work quickly, as the toffee begins to set fast.
Step 4: Add the Chocolate
While the toffee is still hot, sprinkle chocolate chips or chopped chocolate on top. Let them sit for a minute or two until they begin to melt, then spread the chocolate over the surface with a spatula.
My aunt coated both sides of her toffee with chocolate, but I usually only coat one side—it’s less work, and still incredibly delicious.
Step 5: Add Toppings and Cool
If desired, sprinkle additional chopped nuts on top of the melted chocolate for extra crunch. Allow the toffee to cool completely at room temperature. Once set, break it into pieces and enjoy.
Tips for Success
- Use Medium-High Heat – Too low and your toffee may not set properly, too high and it can burn.
- Stir Constantly – Keep the mixture moving so the sugar doesn’t burn on the bottom of the pan.
- Watch the Color – The brown paper bag test is foolproof. The toffee should be golden brown, not pale or dark brown.
- Work Quickly – Once the toffee is ready, move fast when pouring and spreading—it hardens in seconds.
- Store Properly – Keep your toffee in an airtight container at room temperature. It will stay fresh for up to two weeks.
Variations
While this recipe is perfect as-is, there are so many fun ways to customize it:
- Dark Chocolate Toffee – Use dark chocolate instead of milk for a richer flavor.
- White Chocolate Drizzle – Drizzle melted white chocolate over the top for contrast.
- Sea Salt Toffee – Sprinkle flaky sea salt over the melted chocolate before it sets.
- Holiday Toffee – Add crushed peppermint candies or festive sprinkles on top for Christmas.
- Nut-Free Toffee – Skip the nuts entirely for a smooth, classic version.
Troubleshooting Common Problems
Even with a simple recipe, things can go wrong. Here are some common issues and how to fix them:
- Toffee Separates (butter pooling on top): This happens if the heat is too high or the mixture isn’t stirred enough. Don’t panic—just keep stirring until it comes back together.
- Toffee is Too Soft: It wasn’t cooked long enough. Make sure you reach the proper golden-brown color.
- Chocolate Doesn’t Stick: Spread the chocolate while the toffee is still warm so it melts and adheres.
Storing and Gifting English Toffee
English toffee makes a fantastic homemade gift. Once it has cooled and been broken into pieces, place it in decorative tins or jars, wrap with parchment paper, or seal in cellophane bags tied with ribbon.
For storage:
- Room Temperature: Best for keeping the crunch—up to two weeks.
- Refrigerator: Can extend shelf life, but may alter texture slightly.
- Freezer: Store in airtight containers for up to three months.
Why This Recipe Works Every Time
The genius of this recipe is that it doesn’t require any fancy equipment or advanced candy-making skills. The proportions are simple and balanced, the cooking time is short, and the visual color test is reliable. It’s nearly foolproof, which is why I’ve made it so many times with consistent results.
The end product is everything you want in a toffee: buttery, crisp, sweet, and just the right amount of chocolate. It’s versatile, giftable, and so delicious you’ll find yourself making it year after year.
Final Thoughts
Homemade English toffee is more than just a candy—it’s a tradition. Every time I make it, I’m reminded of my aunt’s kitchen, the laughter of family gatherings, and the joy of sharing something special with the people I love. Now, by sharing this recipe, I hope it becomes part of your traditions too.
Whether you’re making it for the holidays, gifting it to friends, or just treating yourself, this English toffee recipe will never disappoint. With its short list of ingredients, easy steps, and incredible flavor, it’s proof that sometimes the simplest recipes are the best ones.
So gather your butter, sugar, and chocolate, and start your own family tradition of English toffee—you won’t regret it