
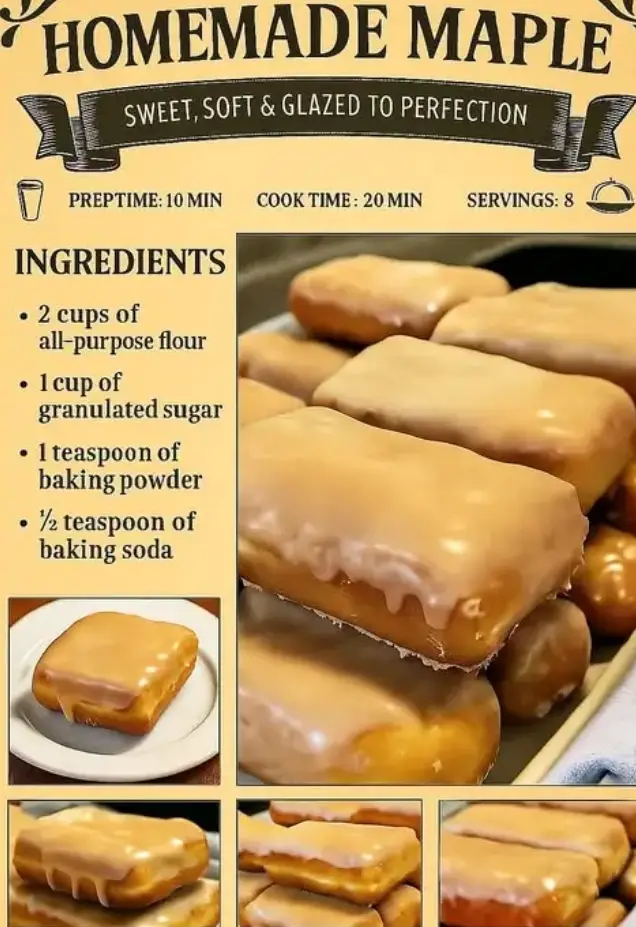
Homemade Maple Donut Bars – Sweet, Soft & Glazed to Perfection
Donuts have long been a symbol of comfort and indulgence. Whether you remember them from childhood visits to a local bakery or associate them with weekend brunches shared with loved ones, they hold a place of nostalgic joy in many hearts. While store-bought donuts offer convenience, nothing compares to the flavor, texture, and satisfaction of crafting your own donuts at home—especially when they’re infused with the rich, warm sweetness of real maple.
Homemade Maple Donut Bars combine the best of both worlds: a soft, pillowy interior with a golden, lightly crisped exterior, all finished with a silky maple glaze that clings to each bite. These donut bars offer the classic fried donut experience without the need for specialized cutters or complicated shaping. Their rectangular form makes them simple to prepare and ideal for dunking, glazing, or enjoying alongside your morning coffee or afternoon tea.
In this guide, you’ll learn not only how to prepare these delicious treats step-by-step but also discover the small details that make this recipe reliably successful—from ingredient insights and frying tips to glaze variations and serving ideas.
The Inspiration Behind Maple Donut Bars
Maple is a flavor rooted in tradition, especially in North American cuisine. The idea of pairing it with soft dough goes back generations. Maple bars became a staple in donut shops in the United States and Canada, often sitting alongside their chocolate-glazed or sugar-dusted cousins. The flavor is both earthy and sweet, making it a welcome departure from overly sugary toppings. This recipe is inspired by that classic bakery item, with a home-cooked twist that brings authenticity and warmth to your own kitchen.
Ingredients You’ll Need
Before diving into the method, take a moment to understand each ingredient’s role. Baking is both science and art, and when it comes to fried dough, precision matters.
For the Donut Bars
- 2 cups all-purpose flour: This forms the structural base of your dough. Make sure to spoon and level your flour to avoid compacting it, which can result in heavy donuts.
- 1 cup granulated sugar: Contributes to sweetness and color while helping to tenderize the dough slightly.
- 1 teaspoon baking powder & ½ teaspoon baking soda: These leavening agents help create a light, airy texture. The combination works well with the acidity of the buttermilk.
- ½ teaspoon salt: Enhances flavor and balances the sweetness.
- ¾ cup buttermilk: Adds moisture and a mild tanginess that complements the maple glaze.
- 2 large eggs: Provide structure and richness.
- ¼ cup melted butter: Contributes to tenderness and a slightly crisp outer layer when fried.
- 1 teaspoon vanilla extract: Adds a subtle depth of flavor that enhances the maple glaze later.
- Vegetable oil (for frying): Choose a neutral oil with a high smoke point, such as canola or peanut oil, to ensure clean frying and consistent texture.
For the Maple Glaze
- 1½ cups powdered sugar: Creates the smooth, sweet base of the glaze. Sift it to prevent lumps.
- 3 tablespoons pure maple syrup: Real maple syrup delivers a rich, distinctive flavor. Avoid imitation syrups for best results.
- 1 tablespoon milk (plus more if needed): Helps thin the glaze to the desired consistency.
- ½ teaspoon maple extract (optional): Intensifies the maple flavor for a more pronounced glaze, especially helpful if your syrup is lighter in taste.
Equipment Checklist
- Mixing bowls (one large, one medium)
- Whisk and spatula
- Rolling pin
- Sharp knife or dough cutter
- Parchment paper and baking tray
- Heavy-bottomed pot or deep fryer
- Thermometer (preferably digital for accurate oil temperature)
- Slotted spoon or spider strainer
- Wire rack and paper towels
- Cooling rack for glazed donuts
Instructions
Step 1: Prepare the Donut Dough
In a large mixing bowl, whisk together the dry ingredients: flour, granulated sugar, baking powder, baking soda, and salt. In a separate medium bowl, combine the wet ingredients—buttermilk, eggs, melted butter, and vanilla extract—and whisk until fully incorporated.
Gradually pour the wet mixture into the dry ingredients. Use a spatula or wooden spoon to mix gently just until a soft dough forms. Be careful not to overmix, as this can make the dough tough. The dough should be soft but not overly sticky.
Cover the bowl with a clean kitchen towel or plastic wrap and let the dough rest for about 10 minutes. This allows the flour to hydrate and gives the leavening agents a head start, which will help the dough puff up nicely during frying.
Step 2: Shape the Donut Bars
After resting, lightly flour a clean work surface and turn the dough out onto it. Use your hands to pat the dough gently into a rectangle, then roll it out to about ½-inch thickness. Avoid using too much flour on the surface—just enough to prevent sticking.
Using a sharp knife, pizza cutter, or bench scraper, cut the dough into bars or rectangles approximately 1×4 inches in size. The shape doesn’t have to be exact, but consistent sizes will ensure even frying.
Place the shaped bars onto a parchment-lined tray and refrigerate them for 10 to 15 minutes. Chilling helps firm up the dough slightly, making them easier to handle and helping them hold their shape during frying.
Step 3: Fry the Donut Bars
Pour 2 to 3 inches of vegetable oil into a deep pot or fryer and heat over medium-high heat until it reaches 350°F (175°C). Use a thermometer to maintain a steady temperature. If the oil is too hot, the outsides will brown too quickly while the insides remain undercooked. If it’s too cool, the donuts will absorb too much oil and become greasy.
Fry the donut bars in batches of 2–4, depending on the size of your pot. Gently lower each one into the oil and fry for 1 to 2 minutes per side, turning once, until golden brown and puffed. Avoid crowding the pot, which can drop the oil temperature.
Use a slotted spoon or spider strainer to remove each donut from the oil and transfer to a plate lined with paper towels to drain excess oil. Repeat until all bars are fried, making sure the oil returns to the proper temperature between batches.
Step 4: Make the Maple Glaze
While the donuts are cooling slightly, prepare the glaze. In a medium bowl, whisk together the powdered sugar, maple syrup, milk, and optional maple extract until the mixture is smooth and pourable. If the glaze is too thick, add a few extra drops of milk. If it’s too thin, add a bit more powdered sugar.
The glaze should be thick enough to coat the donuts without dripping too much, but fluid enough to create a smooth finish.
Step 5: Glaze the Donuts
While the donuts are still warm (but not hot), dip the top of each bar into the maple glaze, letting the excess drip off briefly. Place the glazed donuts on a wire rack set over parchment paper or a tray to catch any drips. Allow the glaze to set for 10–15 minutes before serving.
Tips for Success
- Keep oil temperature steady: Use a thermometer and don’t rush the process.
- Don’t overmix: Stir the dough just until it comes together to keep the texture light and tender.
- Use real maple syrup: It provides an irreplaceable depth of flavor that elevates the glaze.
- Let glaze set: Allowing the glaze to firm up ensures a glossy finish that doesn’t smear or slide off.
- Serve the same day: These donuts are best enjoyed fresh, as they may soften over time.
Flavor Variations
While the maple glaze is a classic, feel free to experiment with different toppings:
- Cinnamon-Sugar Coating: Skip the glaze and toss warm donuts in cinnamon and sugar.
- Chocolate Glaze: Replace the maple glaze with a ganache or cocoa glaze for a chocolate-maple hybrid.
- Maple-Pecan: Top the glazed donuts with chopped toasted pecans for added crunch.
- Espresso Maple Glaze: Add 1 teaspoon of instant espresso powder to the glaze for a more complex, café-inspired flavor.
Serving Suggestions
Maple donut bars pair beautifully with:
- Freshly brewed coffee or espresso
- Hot chai or black tea
- Warm apple cider during fall
- Cold milk for a kid-friendly treat
- A brunch platter with fruit, bacon, and eggs
They also make excellent holiday treats, weekend baking projects, or thoughtful gifts when packaged in parchment and tied with twine.
Storage and Reheating
Storage: Store any leftover donuts in an airtight container at room temperature for up to 2 days. For longer storage, freeze unglazed donuts and reheat before glazing.
Reheating: To refresh, warm the donuts for 8–10 seconds in the microwave or for a few minutes in a low oven. If they were glazed, be aware that reheating may soften the glaze.
Final Thoughts
Homemade Maple Donut Bars are a labor of love with a big reward. The satisfaction of seeing golden bars rise in hot oil and then watching a smooth maple glaze set perfectly over their warm tops is second only to taking that first soft, sweet bite. This recipe invites you to slow down, enjoy the process, and savor a timeless treat made right in your own kitchen.
Whether you’re new to frying or a seasoned baker, this is a recipe that delivers consistent results and plenty of joy. Try it once, and you’ll understand why maple bars have held their place in donut shop displays—and why the homemade version might just be better than anything you’ve ever bought.