

How To Make Wonderfully Cooked Fried Eggs
There’s something almost magical about the simplicity of a fried egg. With just one or two ingredients, a bit of heat, and a well-timed flip (or no flip at all), you can create a warm, comforting, and nutrient-rich meal that’s as perfect on toast as it is on top of a burger or bed of greens. And yet, for all its simplicity, cooking fried eggs perfectly can feel surprisingly tricky.
You might be familiar with the struggle: whites that stick to the pan, yolks that break before they hit the heat, and edges that go rubbery or brown far too quickly. It seems like everyone has a slightly different way of doing it — and every variation comes with its own set of rules. But with one simple tip and a clear step-by-step approach, you can master the art of cooking fried eggs exactly how you like them, every single time.
Let’s break it all down, from the essential gear and ingredients to the one genius tip that guarantees success.
The Beauty of a Perfect Fried Egg
Before diving into technique, let’s talk about what makes a fried egg so special. Fried eggs are versatile, quick to cook, and loaded with flavor and nutrition. They can be:
- Runny and luscious with a perfectly golden yolk (sunny-side up or over-easy)
- Crispy-edged and deeply savory (a hallmark of diner-style breakfasts)
- Gently cooked for a more delicate, softer texture
- Served atop rice bowls, noodles, avocado toast, burgers, and more
The appeal lies in their duality: fried eggs can feel both fancy and humble, both luxurious and effortless. But the real trick is control—and that begins with understanding your egg.
Choosing the Right Eggs
Fresh eggs are always ideal. Fresher eggs hold their shape better, and the whites stay compact without spreading out too much in the pan. Farm-fresh or pasture-raised eggs tend to have richer yolks, firmer whites, and more vibrant color. However, even standard grocery store eggs can yield amazing results with the right technique.
Pro tip: If you’re using older eggs, crack them into a small bowl first to check quality and ensure no shells sneak into your dish.
Equipment Matters
While you don’t need a fancy kitchen setup to fry an egg, using the right tools can dramatically improve your results. Here’s what you’ll need:
- Non-stick skillet or well-seasoned cast iron pan: This reduces the risk of sticking and allows you to control the heat more effectively.
- Flexible spatula: Especially if you’re flipping the egg or need to lift it out gently.
- Lid (optional): Useful if you want the top to cook slightly without flipping (perfect for sunny-side-up lovers).
- Two bowls (per egg): To separate the yolk from the white and prevent breakage.
- Small ramekins (optional): If you’re making more than one egg, ramekins can help you organize the yolks and whites.

The Genius Trick: Separate the Egg Yolks and Whites
Here’s the method that takes the guesswork (and stickiness) out of frying eggs: separate the yolks and whites before cooking. This simple step gives you more control, prevents sticking, and keeps the yolks soft and intact.
Why it works:
- Cooking the whites first ensures they set properly and don’t stick to the pan.
- Adding the yolks later means they cook gently and evenly, with little risk of breaking.
- It’s easier to manage multiple eggs this way, especially if you’re making a larger batch.
Ingredients
You don’t need much — just good eggs and quality fat.
- 2 large eggs (adjust quantity as needed)
- 1–2 tablespoons olive oil (or butter, ghee, or avocado oil)
- Salt and freshly ground black pepper, to taste
Optional toppings:
- Fresh herbs (parsley, dill, chives)
- Crushed red pepper flakes
- Shaved parmesan
- Hot sauce or sriracha
- Toast, avocado, or sautéed greens for serving
Step-by-Step Instructions
1. Separate your eggs carefully.
Crack one egg and gently pass the yolk back and forth between the two halves of the shell, letting the white fall into a clean bowl. Place the yolk into a separate small bowl or ramekin. Repeat with the second egg. You should now have two bowls of whites and two bowls of yolks.
2. Preheat your pan.
Place your skillet on the stove and add olive oil. Heat the pan over medium-low heat. Allow the oil to warm until it shimmers slightly but isn’t smoking. You don’t want it too hot — high heat will overcook the edges before the whites are set.
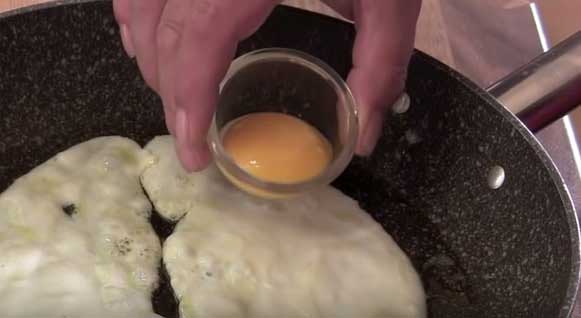
3. Add the egg whites.
Carefully pour the egg whites into the pan, spacing them apart if you’re cooking more than one. They’ll begin to cook gently and may bubble slightly at the edges. Let them set for about 2–3 minutes, until they start to turn opaque and firm.
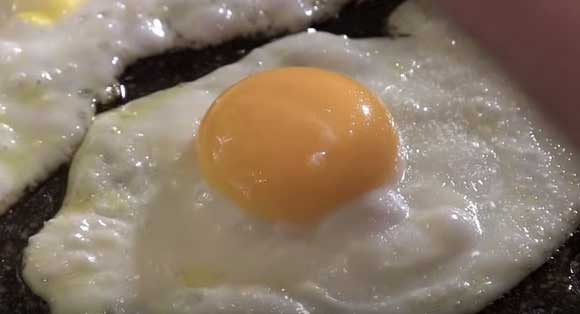
4. Gently place the yolks on top.
Once the whites are mostly set but still slightly jiggly in the center, gently place each yolk in the middle of its corresponding white. Be careful not to break them!
5. Season and finish cooking.
Sprinkle with salt and pepper. Continue to cook until the whites are fully set and the yolks are still soft (another 2–3 minutes). You can cover the pan with a lid for a more steamed texture on the top or leave it uncovered for a classic sunny-side-up look.
6. Serve immediately.
Use a spatula to gently lift each egg from the pan. Serve as-is or with toast, roasted vegetables, or whatever dish you’re complementing.
Variations Based on Preference
Sunny-Side Up:
Follow the above method without flipping the eggs. The whites should be cooked through, and the yolk remains glossy and runny.
Over-Easy:
Once the yolk is added and the whites are fully cooked, flip the egg carefully for just 10–15 seconds. This lightly cooks the top without firming the yolk.
Over-Medium or Over-Hard:
Flip and cook longer — 30 seconds for over-medium (yolk slightly jammy) and 1–2 minutes for over-hard (yolk fully cooked through).
Tips for Success
- Use fresh oil or butter. Old oil or burnt butter can ruin the flavor.
- Heat control is key. Too hot, and the whites overcook or brown too quickly. Too cold, and the whites spread and become rubbery.
- Don’t crowd the pan. Cook eggs in batches if needed. Overcrowding causes uneven heat distribution.
- Crack into a bowl first. Even if you’re not separating yolks, cracking eggs into a bowl gives you more control and helps avoid shell bits.
- Don’t rush. Gentle heat and a little patience yield the best texture and flavor.
Serving Ideas and Pairings
Wonderfully cooked fried eggs can be the star of the plate or a finishing touch. Here are a few ways to serve them:
Breakfast:
- On sourdough toast with smashed avocado and chili flakes
- Alongside crispy bacon or turkey sausage and roasted potatoes
- Over pancakes or waffles for a sweet-and-savory twist
Lunch/Dinner:
- On top of a juicy burger
- Over a rice or grain bowl with veggies and sauce
- As a topping for pizza, shakshuka, or pasta
- Layered onto a sandwich or breakfast burrito
Vegetarian Pairings:
- Sautéed spinach, mushrooms, and goat cheese
- Grilled asparagus and herbed couscous
- Zucchini fritters or lentil patties with tzatziki
Nutritional Benefits of Fried Eggs
Fried eggs aren’t just tasty — they’re also packed with nutrition:
- Protein: Around 6 grams per egg, ideal for muscle repair and satiety.
- Healthy fats: Especially if cooked in olive oil or grass-fed butter.
- Vitamins and minerals: Including B12, iron, selenium, and vitamin D.
- Choline: Crucial for brain and liver health.
While eggs were once feared for cholesterol content, modern nutrition science confirms that moderate egg consumption (1–2 per day) is healthy for most people. Pair them with whole foods and veggies for a balanced meal.
Final Thoughts
At first glance, fried eggs might seem like one of the easiest things to cook. But like many “simple” dishes, they’re deceptively technical. It’s the little things — the heat, the pan, the separation of yolks and whites — that transform a decent egg into something truly wonderful.
By adopting this method and practicing a little patience, you can say goodbye to rubbery whites and broken yolks for good. Whether you love your yolks runny, jammy, or firm, mastering the perfect fried egg gives you a satisfying tool for breakfasts, quick lunches, or even gourmet dinner plating.