
Mom’s Famous Cream Puffs
“My husband gets giddy when he sees that I’m making these. I have to guard them so they actually make it to our party—haha! No need to search any further, this recipe is the best!”
Introduction: A Bite of Nostalgia in Every Puff
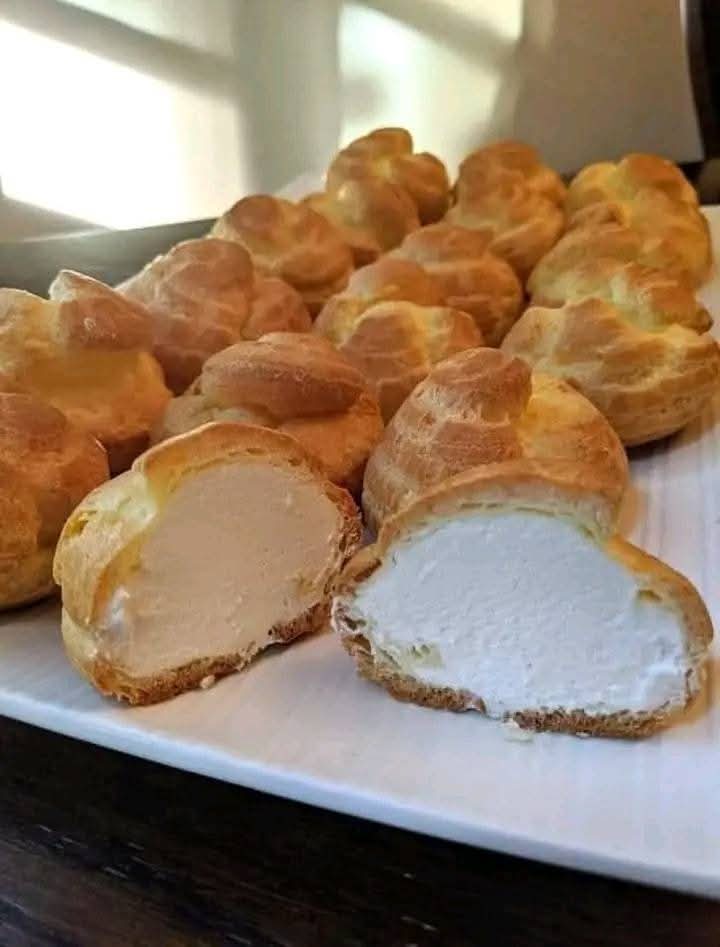
There are some recipes that don’t just satisfy your sweet tooth—they transport you. For me, Mom’s Famous Cream Puffs are the culinary equivalent of a warm hug from childhood. They’re the dessert that makes eyes light up at family gatherings, the one that’s lovingly passed down through generations, and the one that disappears the fastest at any party.
Light, airy, and filled with the most luscious vanilla cream, these cream puffs are deceptively simple to make and incredibly rewarding to share. There’s something special about seeing those golden little pastries puff up in the oven and knowing that the magic of mom’s kitchen is alive and well.
If you’ve never made cream puffs before, don’t worry—they’re easier than you think. With just a handful of pantry ingredients and a little patience, you’ll be whipping up batches of these bakery-worthy treats like a pro. And once you taste that creamy, dreamy filling nestled inside a crisp pastry shell, you’ll understand why this recipe is famous in more than just my family.
Ingredients You’ll Need
For the Cream Puff Shells:
- 1 stick butter (8 tablespoons) – This adds flavor and richness to the dough.
- 1 cup water – The liquid component that helps steam the dough and create puffiness.
- 1 tsp vanilla extract – A touch of warm, fragrant flavor that sets these puffs apart.
- 1 cup all-purpose flour – The structure that holds everything together.
- 4 large eggs – These provide stability, richness, and help the dough rise into perfect puffs.
For Mom’s Famous Filling:
- 1 pint heavy cream – Whips up into a fluffy, rich base for the filling.
- 1 package (3.4 ounces) instant vanilla pudding mix – Adds flavor, texture, and stability to the cream.
- 1/3 cup milk – Helps incorporate the pudding into the cream and keeps the texture just right.
Equipment You’ll Need
- Medium saucepan
- Wooden spoon or rubber spatula
- Stand mixer or hand mixer
- Parchment paper or silicone baking mat
- Baking sheet
- Cooling rack
- Pastry bag or spoon (for filling)
- Fine mesh sieve (for powdered sugar)
Step-by-Step Instructions
Step 1: Make the Choux Pastry (Cream Puff Shells)
Bring butter, water, and vanilla to a boil:
In a medium saucepan over medium heat, melt the butter with the water and vanilla extract. Stir occasionally to ensure the butter fully melts and everything is well combined.
Add flour:
Once the mixture reaches a rolling boil, reduce the heat slightly and dump in the flour all at once. Stir vigorously with a wooden spoon or spatula. The mixture will look strange at first, but keep stirring—it will come together quickly into a smooth dough.
Cook until a ball forms:
Continue stirring until the dough pulls away from the sides of the pan and forms a cohesive ball. This step is crucial—it helps cook off excess moisture, which will ensure your puffs rise properly in the oven.
Cool slightly:
Remove the dough from the heat and let it cool for about 5–10 minutes. It should be warm but not hot to the touch—this will keep the eggs from scrambling when you add them.
Beat in eggs one at a time:
Transfer the dough to a mixing bowl. Using a stand mixer or hand mixer on medium speed, beat in the eggs one at a time. The dough will look slippery or curdled at first, but it will come together into a smooth, shiny batter by the end.
Step 2: Bake the Shells
Preheat your oven to 400°F (200°C).
While it heats up, line a baking sheet with parchment paper or a silicone baking mat.
Drop dough onto sheet:
Using a tablespoon or small cookie scoop, drop mounds of dough onto the prepared baking sheet, spacing them about 2 inches apart. You should get approximately 16 puffs.
Bake for 25–30 minutes:
Bake until the puffs are golden brown and feel firm to the touch. Do not open the oven during baking, or they might deflate.
Cool completely:
Once baked, transfer the puffs to a wire rack and let them cool fully. This helps prevent sogginess and makes them easier to fill.
Step 3: Make Mom’s Famous Filling
Whip the cream:
In a mixing bowl, beat the heavy cream until it starts to thicken.
Add pudding and milk:
Sprinkle in the instant pudding mix and pour in the milk. Continue to beat until stiff peaks form and the filling resembles whipped cream. It should be thick, fluffy, and perfectly scoopable.
Step 4: Assemble the Cream Puffs
Slice the puffs:
Once the shells are completely cool, slice each one in half horizontally with a serrated knife.
Fill with cream:
Use a spoon or pastry bag to add a generous dollop of filling to the bottom half of each puff. Replace the top half like a sandwich lid.
Dust with powdered sugar:
Finish with a light dusting of powdered sugar for that classic, elegant touch.
Tips for Success
- Let the dough cool before adding eggs or they may scramble.
- Use room temperature eggs so they incorporate more easily into the dough.
- Avoid underbaking—a golden crust is key to holding the filling without collapsing.
- Fill just before serving to keep the shells crisp.
- Use a piping bag for neat and consistent filling (or go rustic with a spoon—it’s just as delicious!).
Variations to Try
Chocolate Drizzle
Melt semisweet chocolate and drizzle it over the tops of the filled cream puffs.
Strawberry Cream Filling
Fold in chopped fresh strawberries or strawberry jam for a fruity twist.
Mocha Cream
Add 1–2 teaspoons of instant espresso powder to the pudding filling for a coffee-flavored surprise.
Mini Cream Puffs
Make smaller mounds of dough for bite-sized puffs—perfect for dessert platters or tea parties.
Storage & Make-Ahead Tips
- Unfilled shells can be stored in an airtight container at room temperature for up to 2 days, or frozen for up to 2 months.
- Filling can be made up to a day in advance and kept in the fridge.
- Assembled cream puffs are best enjoyed within a few hours, but can be stored in the fridge for up to 1 day.
Serving Suggestions
- Serve alongside coffee or tea for an afternoon pick-me-up.
- Arrange on a tiered tray for a party centerpiece.
- Turn into a cream puff tower (croquembouche) for a stunning dessert display.
- Pair with fresh berries and a drizzle of caramel for a restaurant-worthy presentation.
Frequently Asked Questions
Can I make the dough ahead of time?
Yes! You can store the cooked dough (before adding eggs) in the fridge for up to 1 day. Bring it to room temperature before continuing with the eggs.
What if my cream is too runny?
Make sure you beat the mixture long enough. If it’s still loose, you can chill it in the fridge to help it firm up.
Can I use Cool Whip instead of heavy cream?
Technically yes, but the flavor and texture won’t be quite as rich or fluffy. For the best results, stick with real whipped cream.
Final Thoughts: A Recipe to Treasure
There’s something magical about a cream puff—especially when it’s made with love and passed down through generations. This recipe is more than just a sweet treat; it’s a piece of family history, a little burst of joy in every bite, and a surefire way to make any gathering feel extra special.
Whether it’s your first time making cream puffs or you’re a seasoned pro, Mom’s Famous Cream Puffs are guaranteed to become a cherished favorite in your own kitchen. So go ahead—whip up a batch, guard them from sneaky hands, and enjoy every delicious moment.
Did you try Mom’s Famous Cream Puffs? Leave a comment below, share your favorite variations, or tag your photos—we’d love to see them!