
Creamy, Chocolatey, and Foolproof!
When it comes to cherished holiday traditions, few things compare to the comforting aroma of warm chocolate, melted butter, and vanilla filling the kitchen. Our classic holiday fudge has been a family treasure for decades—passed down, perfected, and beloved for its incredibly smooth texture, deep chocolate flavor, and fail-proof method. This recipe is not just a festive dessert; it is a piece of nostalgia, a memory preserved in each melt-in-your-mouth bite.
In this comprehensive guide, we share every detail, tip, and technique needed to create a luxurious batch of creamy holiday fudge. From ingredients and methods to expert secrets and creative variations, this is the only fudge recipe you will ever need.
Why This Classic Holiday Fudge Stands Out
Our homemade holiday fudge is celebrated for its superior texture and flavor. Unlike dry or overly sweet store-bought versions, this fudge is:
- Rich and velvety
- Perfectly balanced in sweetness
- Soft yet structured
- Simple to prepare without a candy thermometer
- Ideal for gifting and entertaining
We pride ourselves on a recipe that works for beginners while delivering the gourmet quality seasoned bakers appreciate.
The Perfect Fudge Flavor: What to Expect
Each square offers a decadent combination of semi-sweet chocolate, luxurious butter, and pillowy marshmallow cream, resulting in a fudge that is irresistibly smooth and deeply chocolatey. The evaporated milk enhances its creaminess, while vanilla provides an aromatic finish. The final result is holiday perfection—a treat that disappears in minutes from dessert trays.
Ingredients for the Creamiest Holiday Fudge
To make the finest batch of classic chocolate fudge, gather the following essentials:
- ¾ cup unsalted butter
- 2½ cups granulated sugar
- ⅔ cup evaporated milk (not sweetened condensed)
- 12 oz semi-sweet chocolate chips
- 7 oz marshmallow fluff
- 1 teaspoon vanilla extract
Pro Tip: Use high-quality chocolate chips for maximum flavor impact.
These simple ingredients come together to create a smooth, glossy fudge that sets beautifully and slices cleanly.
Essential Kitchen Tools
Having the right tools makes preparation effortless:
- Heavy-bottomed medium saucepan
- Wooden spoon or heat-safe spatula
- 8×8-inch or 9×9-inch baking pan
- Parchment paper or foil
- Measuring cups and spoons
- Optional: whisk or hand mixer for extra silkiness
Ingredient Substitutions and Flavor Enhancements
For customization and creativity, consider these variations:
Substitutions
- Dark chocolate chips for a deeper, bolder flavor
- Salted butter (omit additional salt)
- Vanilla bean paste for a gourmet elevation
Add-Ins
- Chopped nuts (walnuts or pecans)
- Mini marshmallows folded in before spreading
- Crushed peppermint for a festive twist
- Swirled peanut butter or caramel ribbons
These enhancements allow endless versions of the classic dessert while maintaining its smooth consistency.
Step-by-Step Instructions: How to Make Foolproof Holiday Fudge
Follow these precise steps for a perfect batch every time:
1. Prepare the Pan
Line an 8×8 or 9×9 baking dish with parchment or lightly greased foil. This ensures effortless removal and neat slicing.
2. Melt the Butter
Add the unsalted butter to a heavy saucepan and melt over medium heat.
3. Add Sugar and Evaporated Milk
Stir in granulated sugar and evaporated milk. Continue stirring to prevent sticking.
4. Bring to a Gentle Boil
Allow the mixture to boil for 4–5 minutes, stirring constantly to avoid burning. This step is crucial for the ideal smooth texture.
5. Remove from Heat and Add Chocolate
Take the saucepan off the heat and immediately stir in the chocolate chips. Mix until fully melted and glossy.
6. Incorporate Marshmallow Fluff and Vanilla
Add marshmallow fluff and vanilla extract. Beat vigorously until the mixture becomes silky and cohesive.
7. Transfer and Set
Pour the fudge into the prepared pan and smooth the top. Let cool at room temperature before refrigerating for 1–2 hours to fully set.
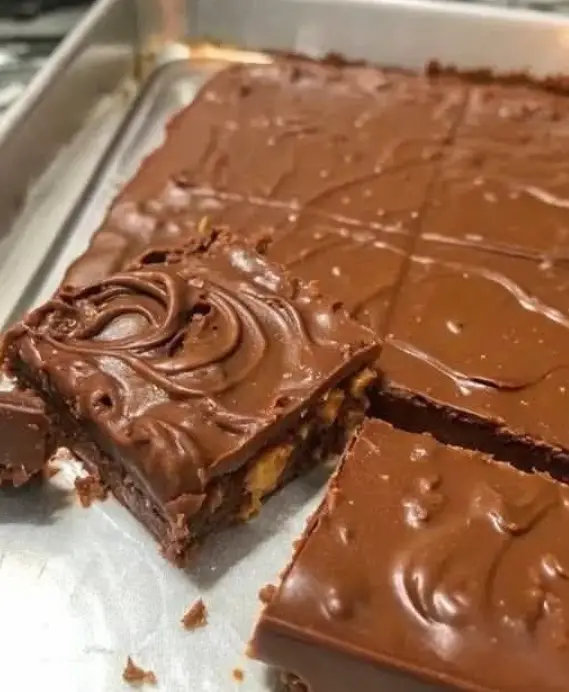
8. Slice and Serve
Cut into even squares and savor each indulgent bite.
Optional: Top with a pinch of flaky sea salt for an elevated salty-sweet finish.
Serving Ideas: Pairing and Presentation
This fudge shines in any festive setting. Consider serving or gifting it with:
- Holiday cookie assortments
- Espresso or after-dinner coffee
- Hot chocolate boards
- Holiday gift baskets
- Dessert platters for gatherings
Its elegant appearance and irresistible texture make it a standout addition to seasonal celebrations.
Expert Tips for the Best Fudge Every Time
- Stir continuously during boiling to ensure smoothness.
- Use a heavy-bottomed pan to prevent scorching.
- Allow the fudge to cool fully before slicing for clean edges.
- For flawless squares, use a knife dipped in hot water and wiped dry.
- Store properly to maintain freshness and texture.
Storage and Make-Ahead Instructions
Refrigerator
Keeps fresh for up to 2 weeks in an airtight container.
Freezer
Freeze for up to 3 months, separating layers with wax paper. Thaw in the refrigerator.
Room Temperature
Lasts up to 1 week in a cool environment.
These storage options make this recipe perfect for holiday prep and gifting.
Frequently Asked Questions
Do I need a candy thermometer?
No. This recipe is reliably foolproof and does not require one.
Can the recipe be doubled?
Yes. Use a 9×13-inch pan and extend cooling time slightly.
Can it be made dairy-free?
It can, with vegan butter, dairy-free chocolate, and coconut evaporated milk—though texture may vary.
Can I substitute sweetened condensed milk?
No. It changes the texture drastically. Stick with evaporated milk for ideal consistency.
Conclusion: The Only Holiday Fudge Recipe You Will Ever Need
Our classic holiday fudge is more than just a dessert—it’s a tradition built on warmth, memory, and the irresistible power of chocolate. With its silky-smooth texture, rich flavor, and simple preparation, it is destined to become a treasured part of your holiday season. Whether made for gatherings, gifts, or quiet winter nights, this fudge delivers pure joy in every bite.