A Decadent Treat to Satisfy All Cravings
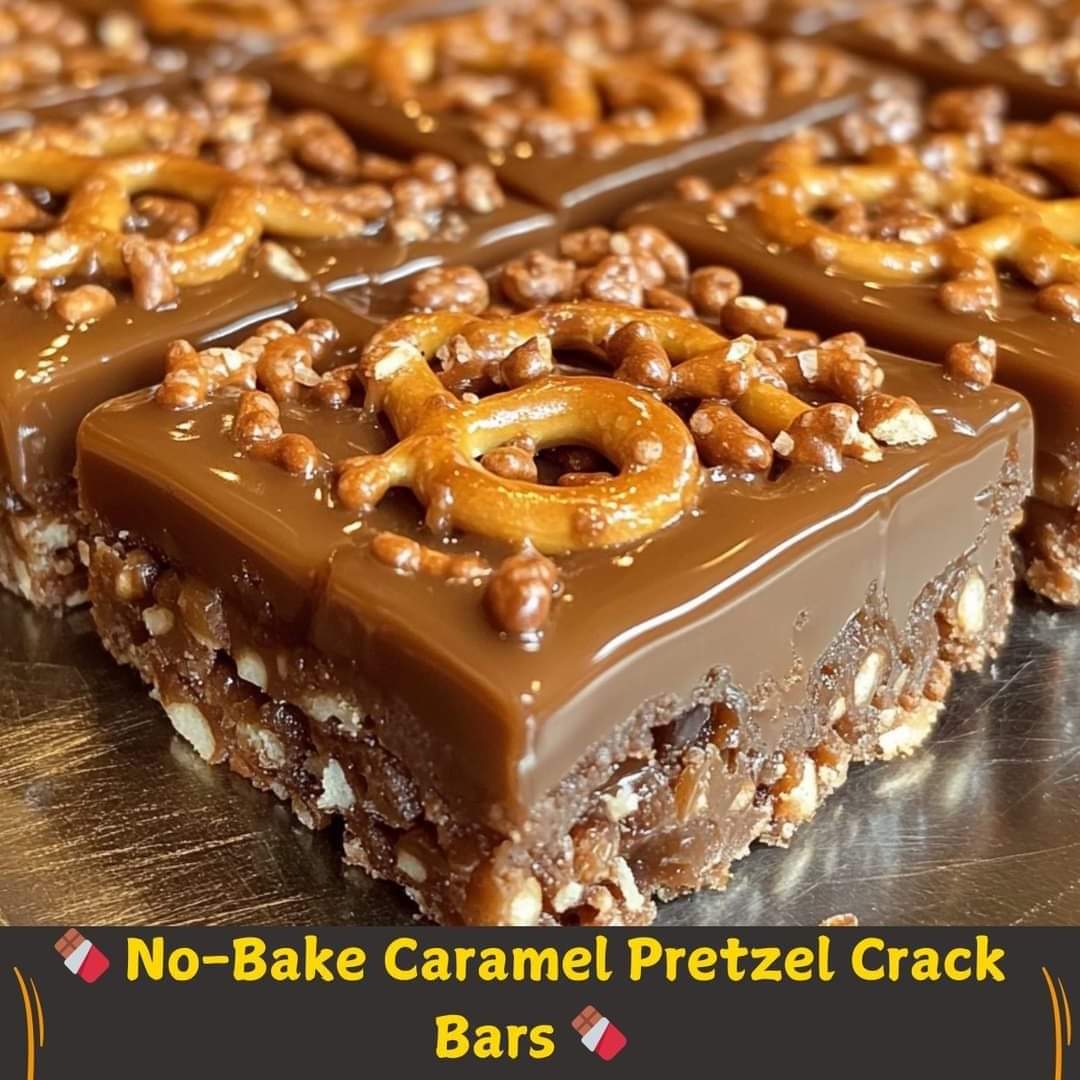
Sweet, salty, gooey, and chocolatey—this recipe for No-Bake Caramel Pretzel Crack Bars is everything you want in a dessert and more! These bars are perfect for any occasion, from casual gatherings to indulgent midnight snacks. With just a few simple ingredients and no baking required, they’re easy to make yet hard to resist. Here’s how you can craft this irresistibly delicious treat!
Ingredients
- 3 cups mini pretzels, coarsely crushed
(Use your hands or a food processor to crush them into bite-sized pieces for the perfect texture.) - 1 can (14 oz) sweetened condensed milk
(This is the key to that creamy caramel layer.) - 1/2 cup unsalted butter
(Soft and rich, it creates the luscious caramel mixture.) - 1/2 cup light brown sugar, packed
(Adds depth and sweetness to the caramel.) - 1/2 cup caramel sauce
(For extra indulgence—store-bought or homemade works great!) - 1 cup semi-sweet chocolate chips, melted
(Balances the sweetness with a slight bittersweet touch.) - Sea salt flakes (optional, for sprinkling on top)
(A sprinkle of salt enhances the sweet-and-salty flavor profile.)
Step-by-Step Instructions
1. Prepare the Pan
Start by lining a 9×13-inch baking pan with parchment paper. Leave enough overhang on the sides to make lifting the bars out of the pan easier once they’re set. This simple step ensures your bars don’t stick to the pan and simplifies cleanup!
2. Create the Pretzel Layer
Spread the crushed pretzels evenly across the bottom of the lined pan. Gently press them down to create a sturdy base. The pretzel layer adds the perfect crunch to contrast the soft caramel and creamy chocolate.
3. Make the Caramel Mixture
In a medium saucepan, combine the sweetened condensed milk, butter, and light brown sugar. Place over medium heat and stir continuously until the mixture is smooth. Allow it to bubble gently, stirring for 3-5 minutes until it thickens slightly. Remove from heat and stir in the caramel sauce for an extra boost of flavor.
4. Pour Over Pretzels
Pour the hot caramel mixture over the pretzel layer. Use a spatula to spread it evenly, ensuring every pretzel piece is coated in gooey goodness. Let it sit for a minute to cool slightly.
5. Add the Chocolate Layer
Melt the semi-sweet chocolate chips in the microwave or over a double boiler until smooth. Pour the melted chocolate over the caramel layer, spreading it evenly with a spatula. For a final touch, sprinkle sea salt flakes on top if desired.
6. Chill and Set
Place the pan in the refrigerator for at least 2 hours, or until the chocolate has hardened and the layers are fully set.
7. Cut and Serve
Use the parchment paper overhang to lift the bars out of the pan. Slice into squares using a sharp knife. For cleaner slices, warm the knife under hot water and wipe it dry between cuts.
Tips for Success
- Prevent Sticky Messes: Grease your spatula lightly with cooking spray to avoid sticking when spreading the caramel or chocolate layers.
- Adjust the Texture: For crunchier bars, add some whole pretzel pieces to the base layer. For softer bars, increase the caramel sauce to 3/4 cup.
- Experiment with Toppings: Add chopped nuts, festive sprinkles, or a drizzle of white chocolate for a personalized touch.
Storage Tips
- Store the bars in an airtight container in the refrigerator for up to a week.
- For longer storage, freeze the bars individually wrapped in plastic wrap and then place them in a freezer-safe bag. Thaw at room temperature before serving.
Why You’ll Love These Bars
These bars combine the best of everything—crunchy pretzels, rich caramel, and smooth chocolate, topped with a hint of saltiness. They’re perfect for holiday platters, gift exchanges, or as a treat to enjoy on a cozy evening at home.
Nutritional Information (Per Serving)
- Calories: ~280
- Carbohydrates: 40g
- Protein: 4g
- Fat: 13g
- Sodium: 250mg
Conclusion
No-Bake Caramel Pretzel Crack Bars are the ultimate indulgence for sweet-and-salty dessert lovers. Whether you’re hosting a party or simply looking for a quick and easy treat, these bars are guaranteed to be a hit. The best part? You don’t need an oven—just a few basic ingredients and some chilling time to whip up these irresistible delights.
Make this recipe a part of your go-to dessert repertoire, and don’t forget to share the joy (and the recipe) with friends and family!

