
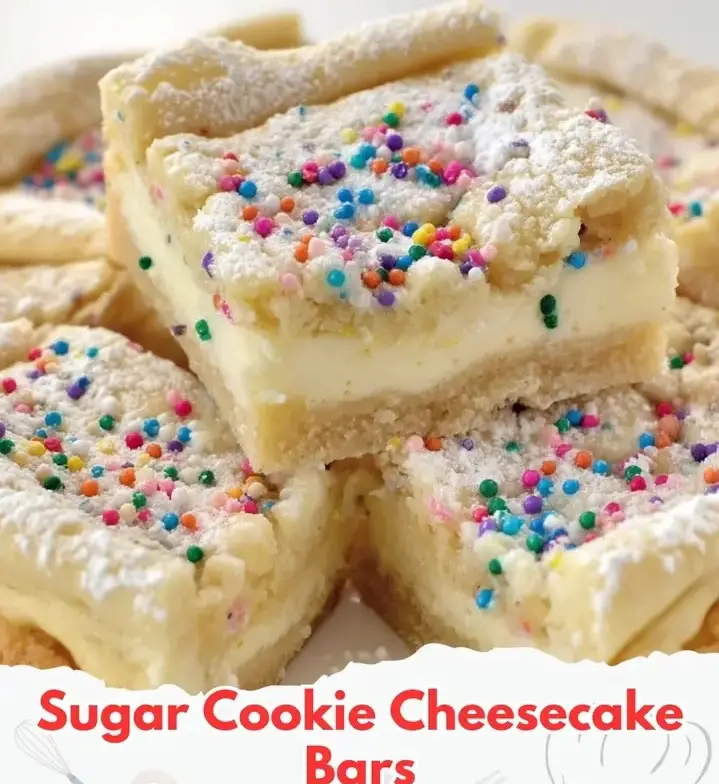
Sugar Cookie Cheesecake Bars – A Sweet & Simple Dessert You’ll Want on Repeat
If you’ve ever found yourself torn between baking a batch of chewy sugar cookies and indulging in a slice of creamy cheesecake, then this dessert is your perfect solution. Sugar Cookie Cheesecake Bars combine the buttery softness of sugar cookie dough with the smooth, rich decadence of cheesecake in one easy-to-make bar. It’s a treat that’s simple enough for everyday baking yet elegant enough for potlucks, holiday parties, baby showers, or weekend family dinners.
In this full-length guide, we’ll walk you through every detail of making these beautiful layered bars—from ingredients and techniques to variations and pro tips. You’ll also learn why this is one of the most versatile, crowd-pleasing recipes in the dessert world.
Why Sugar Cookie Cheesecake Bars Are So Popular
Dessert bars are a baker’s best friend. They’re easier than a full cheesecake, quicker than individual cookies, and much simpler to transport and serve at gatherings. When you marry the beloved flavors of sugar cookies and cheesecake, you end up with a dessert that feels nostalgic yet indulgent. Here’s what makes these bars special:
- Easy to make using store-bought sugar cookie dough
- Requires just a handful of ingredients
- Perfect texture balance between soft, chewy cookie and creamy cheesecake
- Customizable with sprinkles, fruit sauces, or flavored extracts
- Ideal for storing, slicing, and sharing
Ingredients Breakdown
Each ingredient in this recipe serves a specific purpose. Here’s what you’ll need and why it matters.
1. 16.5 oz tube of sugar cookie dough
This serves as both the crust and the topping. Using pre-made dough saves time and ensures a consistent texture. If you prefer, you can substitute with homemade sugar cookie dough, but the store-bought version works perfectly.
2. 8 oz cream cheese, room temperature
Cream cheese is the heart of the cheesecake layer. Make sure it’s at room temperature to avoid lumps and to help it mix smoothly with the egg and vanilla.
3. 1 egg
The egg helps bind the cheesecake filling and gives it a custard-like, rich texture.
4. 1 tablespoon vanilla extract
Vanilla enhances the sweetness and depth of flavor. You can use classic vanilla or experiment with almond or citrus extracts for variation.
5. Optional: sprinkles
Perfect for holidays or birthdays, sprinkles add color and whimsy to the top of the bars. Add them before baking so they adhere well and don’t slide off later.
6. Optional: powdered sugar
A gentle dusting before serving gives the bars a bakery-fresh finish and an extra touch of sweetness.
Tools and Equipment Needed
You won’t need anything fancy to make this dessert. Here’s what you’ll want on hand:
- 8×8-inch baking pan (glass or metal)
- Parchment paper (for easy removal and cleanup)
- Mixing bowls (medium and small)
- Electric mixer or hand whisk
- Spatula or spoon
- Measuring spoons
- Cooling rack
Step-by-Step Instructions
Step 1: Preheat and Prepare
Begin by preheating your oven to 350°F (175°C). Line your 8×8-inch baking pan with parchment paper, or lightly grease it with cooking spray or butter. Lining the pan helps lift the bars out easily and makes slicing much cleaner.
Step 2: Create the Sugar Cookie Crust
Take your sugar cookie dough and press about two-thirds of it evenly into the bottom of the prepared pan. Make sure to cover every corner and compress it slightly for a firm base. This layer will bake into a soft but structured crust that supports the cheesecake filling.
Step 3: Prepare the Cheesecake Filling
In a medium mixing bowl, beat your cream cheese until it’s completely smooth and free of lumps. Then, add in the egg and vanilla extract, mixing until fully combined and creamy. This mixture should be pourable but thick enough to sit on the cookie crust without running.
Step 4: Assemble the Layers
Pour the cream cheese mixture over the cookie base. Use a spatula to spread it evenly from edge to edge. Then take the remaining sugar cookie dough, break it into small pieces, and scatter them across the top of the cheesecake layer. Don’t worry about perfect placement—the rustic, irregular topping adds charm.
Step 5: Add Optional Toppings
If you want to add sprinkles, now is the time. Scatter them lightly over the top before baking. This will bake them into the surface without them melting or smudging.
Step 6: Bake to Golden Perfection
Place the pan in the oven and bake for 25–30 minutes, or until the top is a light golden brown and the cheesecake layer no longer jiggles in the center. Ovens may vary, so start checking around the 25-minute mark.
Step 7: Cool and Chill
Let the bars cool in the pan at room temperature for about 30 minutes, then transfer them to the refrigerator to chill for at least 1 hour. Chilling helps the bars firm up and allows the flavors to develop. Do not attempt to slice the bars while warm—they’ll be too soft and messy.
Step 8: Slice and Serve
Once fully chilled, lift the bars out using the parchment paper edges and transfer to a cutting board. Slice into 9 equal squares or smaller pieces if serving at a party. For an elegant touch, dust with powdered sugar just before serving.
Recipe Summary
- Prep Time: 10 minutes
- Baking Time: 25–30 minutes
- Chill Time: 1 hour
- Total Time: 1 hour 40 minutes
- Yield: 9 bars
- Calories: Approximately 280 per bar
Expert Tips for Success
- Use room temperature cream cheese to prevent lumps and achieve a creamy filling.
- Chill before slicing for cleaner cuts and neater bars.
- Experiment with flavor extracts like almond, coconut, or lemon for variation.
- Make it festive with colored sprinkles for holidays like Valentine’s Day, Christmas, or birthdays.
- Freeze extras by wrapping bars individually and storing them in an airtight container for up to 1 month.
Variations and Add-Ons
Looking to take this recipe to the next level? Try these delicious variations:
- Fruit Swirl Bars: Drop spoonfuls of raspberry jam or lemon curd over the cheesecake filling and swirl with a knife before adding the top layer of cookie dough.
- Chocolate Chip Twist: Mix mini chocolate chips into the cheesecake filling or sugar cookie dough.
- Graham Cracker Crust: For a more traditional cheesecake vibe, press a graham cracker crust into the base instead of sugar cookie dough.
- Holiday-Themed Bars: Use holiday-specific sprinkles or food coloring in the filling for a seasonal touch.
Storing Your Sugar Cookie Cheesecake Bars
Once baked and cooled, store the bars in an airtight container in the refrigerator. They’ll stay fresh for up to 5 days. If you want to make them ahead, they freeze beautifully—just place parchment between layers to prevent sticking.
Frequently Asked Questions
Can I use homemade sugar cookie dough instead of store-bought?
Yes! You can use your favorite sugar cookie recipe. Just be sure the dough is soft and pliable, not dry or crumbly.
Can these bars be made gluten-free?
Yes. Substitute a gluten-free sugar cookie dough and make sure your cream cheese and vanilla extract are certified gluten-free.
Can I double the recipe for a 9×13 pan?
Absolutely. Simply double all ingredients and extend the baking time by 5–10 minutes as needed.
What if I don’t have parchment paper?
You can grease your pan well, but parchment helps with lifting the bars out cleanly. If skipping it, let the bars cool completely before removing from the pan.
Final Thoughts
Sugar Cookie Cheesecake Bars are the perfect hybrid dessert that brings together the nostalgic flavor of sugar cookies and the luxurious creaminess of cheesecake in every bite. They’re easy enough for beginner bakers but impressive enough to serve at parties or celebrations. Whether you’re baking for your family, a holiday cookie exchange, or just to satisfy a sweet craving, this recipe will become a go-to favorite in your kitchen.
With simple ingredients, customizable options, and fail-proof instructions, you’ll find yourself making these again and again. Don’t be surprised if they disappear the moment you set them on the table.